Why cleaning matters now more than ever
We clean earbuds and headphones regularly to maintain sound quality, protect microphones and sensors, and preserve warranties as designs grow more sealed and water-resistant. This care also keeps ecosystem features working smoothly and extends device longevity across competitive product lines.
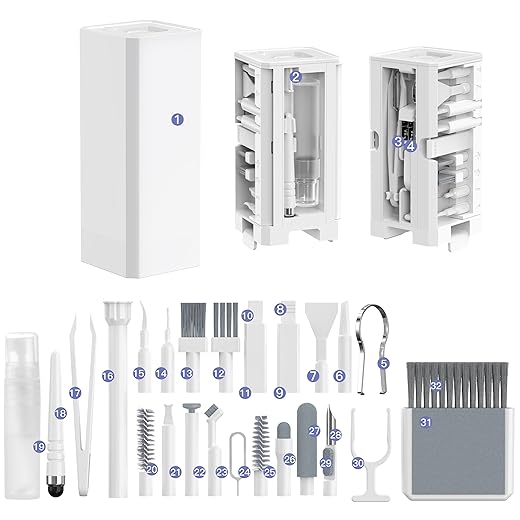
What we need
We use these essentials to preserve fit, sound, and longevity

Clean Your AirPods Meshes: Simple Apple Support Guide
Power down and prime the device
Don’t risk a short — we always start by disconnecting and pausing. Why? Because sensors, charging contacts, and paired ecosystems don’t like surprise moisture.Power off your headphones and AirPods before you touch anything. We want to avoid accidental inputs, transient faults, and weird pairing behavior while we clean.
Follow these quick actions
Think ecosystem: an active AirPods pair can pause music on an iPhone, re-pair to a Mac, or trigger voice assistants across Apple, Samsung, and Sony devices — the same cross-device quirks we flag in our travel-headphones guide. We also recommend letting recently worn earbuds cool to room temperature so condensation from breath or body heat doesn’t trap cleaning moisture inside drivers.

Remove ear tips and accessories first
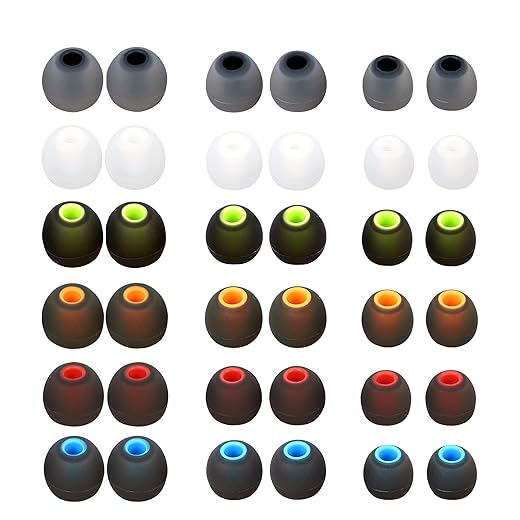
Think of ear tips as the washable socks of earbuds — remove before you scrub. Curious how many brands make tips replaceable? More than you think.Remove silicone and foam tips, memory-foam sleeves, and detachable grills before we start cleaning. Expose clogged meshes so we can clear debris without risking internal components or drivers.
Note modular ecosystems (AirPods Pro, Galaxy Buds, Jabra Elite): their tips are meant to be swapped and washed. Avoid prying glued or one-piece designs—those preserve seals and can void warranties or damage waterproofing if forced; read the FTC service-contract basics before you assume a DIY clean is covered.
Photograph tip positions and any left/right markings with our phone so reassembly is exact.
Wash ear tips safely
Soap and water usually win — hand sanitizer is for hands, not silicone. Want them truly fresh? Here’s how we do it without ruining foam.Soak silicone tips in warm water with a drop of mild dish soap for 3–5 minutes; gently rub the inside and outside to lift oils and wax.
Rinse silicone tips thoroughly under running water and air-dry on a lint-free towel.
Compress foam tips repeatedly while briefly submerging in soapy water; squeeze to push soap through but do not soak for long.
Rinse foam tips, blot excess water with a lint-free cloth, and let fully air-dry (plan on up to 24 hours for dense memory foam).
Avoid using isopropyl alcohol on some foam materials, as it can harden or crumble memory-foam sleeves.
Replace cheap, torn, or permanently stained tips from headphone accessories; buy OEM or high-quality replacements to preserve fit and ANC sealing, which matters for soundstage and noise-cancellation performance.

Clean housings, meshes, and grills carefully
A soft brush and delicate hands beat Q-tips dipped in force. Want better mic clarity and less hiss? This step moves the needle.Use a soft‑bristle brush to dislodge debris from speaker meshes and microphone ports.
Brush outward so we don’t push wax deeper into the drivers — NIH earwax guidance explains why compacted wax belongs in a clinic visit, not deeper in a mesh.
Wipe housings and contact surfaces with a lint‑free cloth slightly dampened with 70% isopropyl alcohol.
Avoid applying liquid directly to meshes or ports — for example, if your AirPods sound muffled after a run, this stops surface oils from seeping inward without soaking the internals.
Roll a dry cotton swab across meshes or press adhesive putty against them to lift trapped particles.
Use low‑pressure compressed air in short bursts only; never blast at high pressure that can dislodge delicate drivers.
Check manufacturer notes for fragile grills—premium designs like those in our Bose QuietComfort Ultra review rely on precise port tuning, so keeping meshes clear preserves bass, clarity, ANC and ambient‑mode performance compared with similar models.

Tidy the charging case and ports
Cases collect more than dust — they host grime that affects charging and pairing. A clean case equals reliable charging and fewer connection headaches.Open the case and work over a soft towel so debris falls where we can see it.
Brush corners, hinge and rubber seals with a dry soft‑bristle brush or wooden toothpick, nudging lint outward—be gentle.
Wipe interior surfaces with a lint‑free cloth slightly dampened with 70% isopropyl alcohol; do not let liquid pool.
Clean charging contacts and pins only if residues remain: swab gently with a 70% isopropyl swab and allow to dry completely before closing.
Avoid inserting metal tools into Lightning or USB‑C ports—never short or pry the connector; follow our USB‑C charging guide when you clean case contacts.
Keep MagSafe and wireless charging pad contact areas free of grit and lint to prevent intermittent charging and heat buildup.
Reassemble, test, and set a maintenance routine
Clean once, feel the difference; maintain weekly for peak performance. How often depends on use habits — here’s our rule of thumb.Reattach ear tips and snap housings and cases closed only after every piece is completely dry. Power on the device and run a quick, focused check.
Repeat targeted cleaning if problems persist; do not open sealed units ourselves—OEM service preserves warranty and often resolves deeper issues under the FTC right-to-repair proposal.
Document cleaning dates and keep a small kit with spare tips and wipes. Adopt a cadence: weekly wipe for daily users, monthly deep clean for occasional listeners—small habits protect ANC, battery life, and seamless ecosystem performance.
Small effort, big payoff
We keep cleaning simple but methodical: safe materials, measured techniques, and steady upkeep preserve sound quality, device lifespan, and ecosystem smoothness — browse more how-to guides and our full headphones aisle when it is time to replace worn gear. Try this routine, notice the difference, and share your results so we can compare experiences and refine practices together.
Frequently asked questions
What should I prepare before I clean airpods, headphones, and ear tips safely?
Start with the checklist in the “What we’ll need” section above—measure your space, confirm compatibility with your gear, and read the full walkthrough once before you change settings or buy parts. Clean airpods, headphones, and ear tips safely goes faster when prep is done upfront.
How long does it take to clean airpods, headphones, and ear tips safely?
Most readers finish in about 30–90 minutes if they already have the right parts, but budget extra time for measurements, firmware updates, or a second pass when something does not behave the way the manual suggests on the first try.
What is the hardest part when you clean airpods, headphones, and ear tips safely?
The step that trips people up is usually alignment or configuration—getting measurements, cable routing, or software settings right before you commit. If results still look off, re-check the basics in order instead of swapping hardware immediately.
What mistakes should I avoid when I clean airpods, headphones, and ear tips safely?
Skipping measurements, ignoring ventilation or port limits, and rushing the final test are the common failures. Photograph your starting setup, label cables, and verify the outcome with the same content or workflow you will use every day—not a one-off demo.
When should I call a pro instead of trying to clean airpods, headphones, and ear tips safely myself?
Bring in help when the job needs structural work, licensed wiring, or tools you do not own, or when repeated attempts still fail after you have followed the troubleshooting section. A short paid visit can cost less than replacing gear you damaged by forcing the install.

Princess Rioboca is the Lead Editorial Writer at Option Cutter, bringing over seven years of hands-on experience in consumer technology journalism. Specializing in home networking and smart home architecture, she transforms complex technical data into practical, real-world upgrades. Princess personally tests and audits every product she reviews—evaluating real-world Wi‑Fi throughput, cable management durability, and streaming ecosystem stability—to filter out spec-sheet noise. Her rigorous, field-tested insights are designed to give readers transparent, unbiased buying advice on what to purchase, what to skip, and exactly why.