Quick Overview: Why a Smart Thermostat Deserves a Moment
We’ll guide you through a confident, no‑nonsense install that balances compatibility, UI, and ecosystem trade‑offs in our how-to guides. A smart thermostat can save up to 15 percent on heating — enough to pay for itself — so we focus on design, integrations, and user experience.
What You'll Need
Assess Your Wiring and HVAC Compatibility
Is your system actually ready for a smart upgrade—or will we hit a dead end?Audit the existing thermostat and HVAC. We open the thermostat, photograph the terminal block, and label each wire. Look for a C‑wire first—its presence determines many smart‑thermostat choices.
Identify the system: conventional furnace/AC or a heat pump. Note specialty controls like two‑stage, millivolt (gas fireplaces), or line‑voltage (electric baseboard).
Important things to record
Photograph wiring and labels—compatibility is where most installs fail. Some brands assume a constant power source and offer power adapters or sensor. Knowing this up front steers our thermostat choice and avoids surprises that kill the user experience.
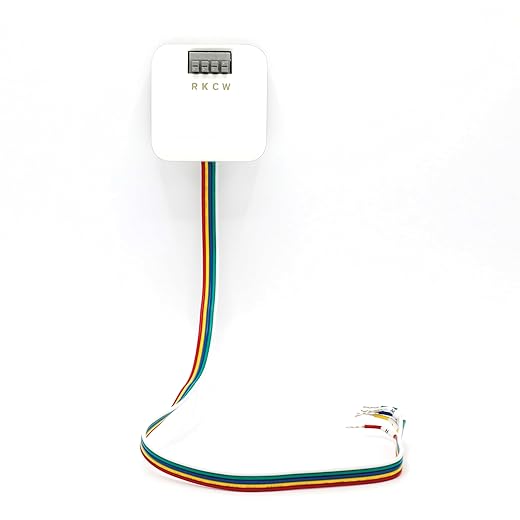
Choose the Right Thermostat for Your Home
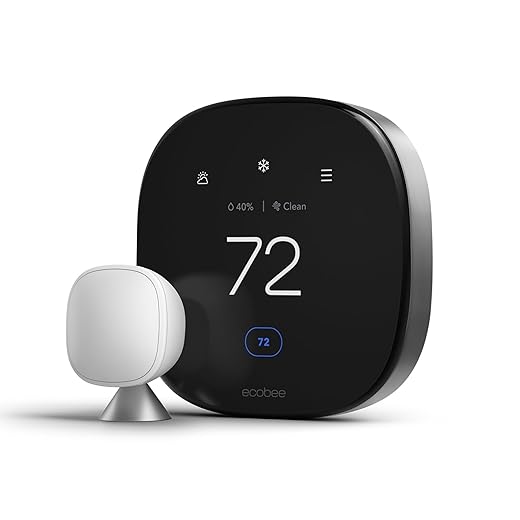
We won’t pick gadgets by looks alone—ecosystem and compatibility trump style.Compare Nest, Ecobee, Honeywell, and budget brands across UI clarity, integration with Apple/Google/Alexa smart home, sensory processing disorder. Focus on real‑world UX, not showroom polish.
Check these quick trade-offs
Weigh learning algorithms versus manual scheduling—learning sacrifices predictability for convenience. Prioritize HVAC compatibility and ecosystem fit: a reliable app and stable integrations matter. Factor long‑term costs—subscriptions can turn platform choice into a market decision, not just a feature pick.

Turn Off Power and Remove the Old Thermostat Safely
Sounds basic, but one wrong move can fry your system—here’s our safe approach.Cut power at the HVAC breaker and the furnace switch to avoid shorting control circuits.
Verify power is off with a non‑contact voltage tester or a multimeter before we touch any wires.
Remove the thermostat faceplate gently to expose the terminals and cradle the base so wires don’t tug.
Document each wire with close photos and a quick note listing terminal letters (R, C, W, Y, G) and any jumpers.
Label each lead with painter’s tape and a pen so reconnection is frictionless.
Note mounting method and wall damage (plaster, paint rings) — older systems often hide missing C wires or unconventional jumpers; preserving parts protects warranty and speeds the next steps.

Wire and Mount the New Thermostat Correctly
Precision wiring: it's fiddly, but it determines how well your thermostat actually performs.Match each labeled conductor to the corresponding terminal on the new base using our photos and tape labels. Pull a little slack so wires don’t tug when you seat the thermostat.
Secure wires per the spec: tighten screw terminals firmly or insert into spring clamps. Screw terminals favor long‑term stability; spring clamps speed installs but can loosen over years.
Install the mounting plate level and flush. Use the supplied anchors, a small bubble level, and a thin shim to hide paint rings on uneven plaster; we often shim 1–2 mm at the bottom.
Decide how to handle a missing C‑wire: pick a vendor power‑extender kit, a common‑wire adapter/Add‑A‑Wire, or run a new conductor. Each trades cost, reliability, and ecosystem compatibility.
Route cables neatly, clip them to the wall, and verify solid contact—intermittent connections cause phantom errors and ruin the user experience.

Set Up Software, Integrations, and Initial Calibration
Connecting to Wi‑Fi is just the start—this step makes the device useful in our home.Follow the app flow to register the thermostat, update firmware, and join your Wi‑Fi (many units prefer 2.4 GHz). Watch the firmware step—updates fix flakiness and add integrations that matter.
Name zones and place optional remote sensors where you actually need comfort—example: label a sensor “Upstairs — Kids’ Room” and put it on a nightstand, not in a closet.
Link the thermostat to voice assistants and hubs to decide ecosystem lock‑in. Common options:
Calibrate temperature offset by comparing a cheap room thermometer to the thermostat reading and apply the adjustment. Set a simple baseline schedule or enable the learning mode and expect 1–3 weeks of adaptation.
Review privacy and subscription prompts: weigh remote analytics and energy reports against monthly fees and cloud dependence.

Test, Optimize, and Troubleshoot Common Issues
If it's not saving energy, it's not doing its job—let's make sure it actually performs.Run heating and cooling cycles to verify relays and observe system response; we watch for short‑cycling, incorrect mode switching, or fan issues.
Watch for short‑cycling symptoms—example: if the compressor cuts off within two minutes, the unit is short‑cycling.
Recheck wiring, ensure firmware is current, and consult diagnostics in the app when problems appear.
Contact a technician for persistent problems like unexpected HVAC behavior or lack of C‑wire power.
Use energy reports and ambient comfort data over two weeks to fine‑tune schedules and validate savings.
Compare vendor analytics and integration depth; we prefer products that expose diagnostics and tie performance to local weather and utility rates, because that’s where ecosystem design proves ROI.
You’re Done—Here’s What to Expect
We’ll monitor comfort and energy reports for weeks; the right thermostat and integrations simplify life and cut costs. If not, pro HVAC help is sensible. Try it today, share results.
Frequently asked questions
What should I prepare before I install a smart thermostat without hvac experience?
Start with the checklist in the “What we’ll need” section above—measure your space, confirm compatibility with your gear, and read the full walkthrough once before you change settings or buy parts. Smart thermostat without hvac experience goes faster when prep is done upfront.
How long does it take to install a smart thermostat without hvac experience?
Most readers finish in about 30–90 minutes if they already have the right parts, but budget extra time for measurements, firmware updates, or a second pass when something does not behave the way the manual suggests on the first try.
What is the hardest part when you install a smart thermostat without hvac experience?
The step that trips people up is usually alignment or configuration—getting measurements, cable routing, or software settings right before you commit. If results still look off, re-check the basics in order instead of swapping hardware immediately.
What mistakes should I avoid when I install a smart thermostat without hvac experience?
Skipping measurements, ignoring ventilation or port limits, and rushing the final test are the common failures. Photograph your starting setup, label cables, and verify the outcome with the same content or workflow you will use every day—not a one-off demo.
When should I call a pro instead of trying to install a smart thermostat without hvac experience myself?
Bring in help when the job needs structural work, licensed wiring, or tools you do not own, or when repeated attempts still fail after you have followed the troubleshooting section. A short paid visit can cost less than replacing gear you damaged by forcing the install.

Princess Rioboca is the Lead Editorial Writer at Option Cutter, bringing over seven years of hands-on experience in consumer technology journalism. Specializing in home networking and smart home architecture, she transforms complex technical data into practical, real-world upgrades. Princess personally tests and audits every product she reviews—evaluating real-world Wi‑Fi throughput, cable management durability, and streaming ecosystem stability—to filter out spec-sheet noise. Her rigorous, field-tested insights are designed to give readers transparent, unbiased buying advice on what to purchase, what to skip, and exactly why.