Why a Better Home Network Is the Most Practical Upgrade You Can Make
Our home network is the invisible foundation for streaming, remote work, gaming, and the swarm of smart devices we live with. We argue that improving it is rarely about chasing headline specs; it’s about solving pain points with trade-offs between cost, complexity, and user experience.
In this guide we show a clear diagnostic workflow: map your network, find bottlenecks, and prioritize fixes. Then we rethink routers—hardware design, placement, and real-world performance—and explain when to run Ethernet and how to wire a smarter backbone.
We walk through mesh systems, extenders, and ecosystem fit, then close with security, monitoring, and a maintenance playbook to keep things running smoothly.


Start with a Diagnosis: Map Your Network and Find Real Bottlenecks
We treat network troubleshooting like detective work: gather data, form a hypothesis, then confirm. The goal is to stop treating dropouts and buffering as mysteries and start making decisions based on where the problem actually lives — device, Wi‑Fi coverage, local wiring, or the ISP.
Run baseline tests where people use the internet
Begin with a wired baseline: connect a laptop directly to the modem (bypass any router) and run Speedtest (ookla) and Fast.com to confirm your ISP speed. Then repeat the same speed and latency tests in the rooms where people complain — on Wi‑Fi and wired if possible. Use simple latency checks (ping to 8.8.8.8 or use PingPlotter) to see jitter and packet loss over time; a one‑off speed snapshot rarely reveals intermittent latency spikes that wreck gaming or video calls.
A short, practical testing checklist
This quick loop often tells you whether the issue is the ISP, your router, or the in‑home wiring.
This is where basic cabling tools pay off. If you run ethernet or suspect wall‑jack faults, a handheld cable tester saves hours of guessing.
Map devices and single points of failure
Inventory devices with a network scanner app (Fing, or the router’s device list). Sketch a simple topology: modem → router → switch → wired devices / APs. Look for single points — one aging switch feeding an entire floor, or a modem/router combo that’s years past its DOCSIS spec. Those single points determine whether a small targeted fix or a more substantial hardware upgrade is needed.
When the ISP or modem is actually the root cause
Consistently low speeds at the modem, or high packet loss seen during multiple wired tests, point to the ISP or modem. Confirm by testing at different times and calling your ISP with specific logs: timestamps, speed test results, and packet loss samples. If you have a DOCSIS modem, check its firmware and channel errors in the status page — high uncorrectable errors mean line issues, not your router.
Tools that work across ecosystems
Modern consumer routers often hide telemetry; avoid vendor lock‑in by using vendor‑agnostic tools: Speedtest, PingPlotter, NetSpot for heatmaps, and Fing for device discovery. Power users will appreciate UniFi’s visibility; mainstream users should stick with apps that give repeatable data rather than opaque “optimization” dashboards.
Rethink the Router: Hardware Design, Placement, and Real-World Performance
We often see people buy routers by headline throughput and wonder why their home still stutters. In practice, antenna layout, cooling, and firmware behavior shape the day‑to‑day experience more than “up to X Gbps” numbers. We look at routers like phones: industrial design and software updates determine how well they live in our homes.
Hardware matters as much as megabits
Antenna placement affects how radio waves spread; an internally packed router with hidden antennas can perform worse in real rooms than a slightly older model with well‑spaced external arrays. Thermal design matters too: under‑ventilated routers can throttle after sustained loads — you’ll notice frame drops in video calls, not faster peak speeds. Firmware is the quiet differentiator: frequent security and stability updates from companies like Ubiquiti or Asus keep networks healthy; ISP‑supplied gateways often lag on patches.
A practical, budget‑friendly choice that balances sane hardware and consistent firmware cadence is the TP‑Link Archer AX21 AX1800 Wi‑Fi 6 Router.
Placement: where you put a router changes everything
Small placement adjustments yield outsized gains. We use three simple rules:
Ceiling vs. shelf mounting: ceiling mounting gives excellent horizontal coverage for single‑floor, open‑plan homes and is great above living spaces. Shelf mounting is easier for maintenance and usually fine in smaller apartments or when vertical signal travel (between floors) matters. Ceiling mounts sometimes complicate cooling and cable runs; shelf mounts can be blocked by furniture.
Quick, high‑leverage tweaks
Choose the right class: a compact decision tree
Match the router class to your layout, household size, and willingness to tinker — that alignment is what actually improves daily life.
Wired Backbones and Smart Switches: When to Run Ethernet and How to Do It Right
We treat a wired backbone as the UX gold standard: predictable latency, consistent throughput, and a reliable home for bandwidth‑hungry devices and smart‑home hubs. Below we give pragmatic wiring strategies and the simple rules we use to avoid turning a neat project into a weekend from hell.
When to pull cable (and when not to)
Run Ethernet when you have any of these:
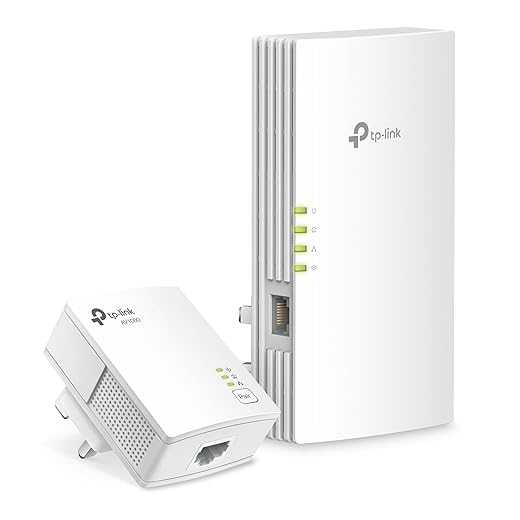
If you’re renting, have short runs, or your walls are unperforable, consider MoCA (coax) or modern powerline adapters (HomePlug AV2) as fallbacks — they’re not as clean as true Ethernet but often beat a flaky Wi‑Fi hop.
Basic wiring best practices
PoE, switches, and cost tradeoffs
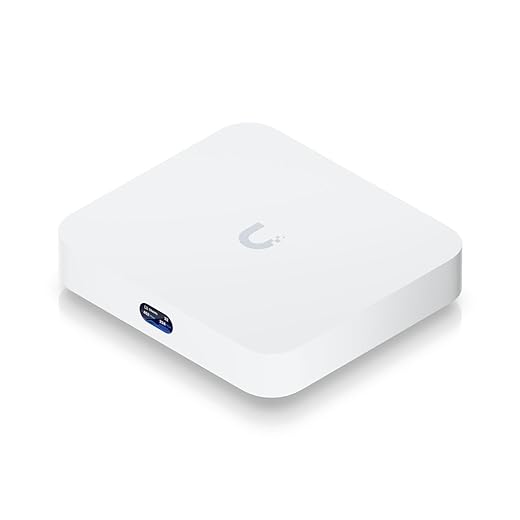
PoE simplifies installs: a single PoE switch can power APs and cameras, removing the need for nearby outlets. For small installs a PoE-enabled 8‑port (TP‑Link TL‑SGB1008P) or entry UniFi switch works well. Managed switches give VLANs, QoS, and monitoring — handy if you segment IoT devices — but cost more. Our shorthand:
Practical how‑to checklist
Next we’ll take wired backbones and show how they let mesh systems and extenders behave the way they should — quietly and reliably.
Mesh, Extenders, and Ecosystems: Designing Wireless Coverage that Just Works
We size wireless solutions by one user‑experience question: does the network feel like one seamless system or a patchwork? That perception dictates real outcomes — roaming behavior, latency during a Zoom call, and whether a phone stubbornly clings to a weak signal.
Mesh vs. extender: how they behave in the house
A true mesh system uses coordinated access points and a backhaul (wired or dedicated wireless) so nodes hand off clients cleanly and keep latency low. Many modern meshes present one SSID and use controller logic to steer devices, and some support 802.11k/v/r roaming aids — when it works, you walk from room to room without dropped streams.
Extenders usually rebroadcast an existing Wi‑Fi network (sometimes under a new SSID). That can double wireless hops and add latency; worse, many devices don’t switch APs quickly, so you get “sticky client” problems. For gaming or video calls, the difference is obvious: meshes with wired backhaul or dedicated wireless backhaul behave predictably; extenders are fine for occasional dead‑spot rescue.
UX, ecosystems, and why vendor choices matter
Setup and ongoing experience are where value shows up. Some systems (Google Nest, Eero) prioritize slick apps and cloud‑managed simplicity. Others (Asus ZenWiFi, Ubiquiti UniFi) give granular controls and local management for people who want it. Vendor ecosystems also bundle features — parental controls, guest networks, URL filtering, device-level QoS — sometimes behind subscriptions. Smart‑home integrations matter too: a mesh that ties into Google Home or Alexa can simplify device discovery; HomeKit support is less common but useful if you’re in Apple’s garden.
Practical advice: pick the path that fits your home
We find that matching the system to layout, tech comfort, and willingness to trade convenience for control gets the best experience. Next, we’ll look at how to keep whatever system we choose secure, visible, and tuned over time.
Security, Monitoring, and Ongoing Optimization: Keep the Network Healthy
We treat a home network like a living service: it needs maintenance, visibility, and occasional tuning. Fixing something once is great, but preventing regressions and spotting slow creeps — a misbehaving camera, a firmware regression, or a creeping device count — is what keeps day‑to‑day life smooth.
Baseline security hygiene (do this today)
A practical rule of thumb: assume every cheap IoT gadget will try to phone home. We once tracked a smart plug using 10 GB in a week — segmentation limited the blast radius.
Continuous monitoring: metrics, tools, and balance
Watch a handful of signals, not all of them:
Useful tools range from simple to pro: Fing or GlassWire for device discovery; Pi‑hole for DNS filtering and visibility; UniFi/Router dashboards for per‑device stats; Home Assistant or Prometheus + Grafana for long‑term graphs. Cloud‑managed systems (Eero, Nest, some Netgear) give polished alerts and push notifications; local systems (UniFi, Asus Merlin, OpenWrt) give control and privacy. The trade‑off is UX vs. ownership — subscriptions like Eero Secure or Netgear Armor add features but come with recurring costs and telemetry tradeoffs.
Reading logs without drowning
Don’t scan logs line‑by‑line. Set thresholds and alerts: repeated DHCP rejects, frequent reauths, or sustained bandwidth anomalies. Keep 30–90 day rolling logs and focus on new or persistent patterns rather than every transient error.
Quarterly checklist (15–30 minutes)
With steady monitoring and these small habits, we prevent most surprises — and when something does go wrong, we find it quickly and fix it before it degrades everyday life. Next, we’ll pull these threads into a practical path forward.
A Practical Path Forward: Prioritize What Improves Day‑to‑Day Experience
We finish with a clear playbook: diagnose first, fix placement or ISP problems next, add a wired backbone where it moves the needle, then pick a mesh or router strategy that matches our device ecosystem and maintenance appetite. In today’s market hardware varies wildly in real‑world throughput, firmware maturity, and cloud lock‑in, so we favor changes that reduce dropouts, stabilize latency, and simplify device management rather than chasing headline speeds.
Finally, adopt a lightweight maintenance routine—basic monitoring, firmware updates, and occasional speed checks—and balance budget, effort, and long‑term maintainability. That pragmatic sequence gives the biggest UX wins for most households; start small, measure, and iterate. Expect fewer headaches and smoother streaming.

Chris is the founder and lead editor of OptionCutter LLC, where he oversees in-depth buying guides, product reviews, and comparison content designed to help readers make informed purchasing decisions. His editorial approach centers on structured research, real-world use cases, performance benchmarks, and transparent evaluation criteria rather than surface-level summaries. Through OptionCutter’s blog content, he focuses on breaking down complex product categories into clear recommendations, practical advice, and decision frameworks that prioritize accuracy, usability, and long-term value for shoppers.