Why a compact subwoofer matters in apartment life
A compact subwoofer can dramatically improve music, movies, and gaming by adding deeper, more controlled bass without overwhelming a small living space. In this how-to guide, we explain how the right subwoofer enhances clarity, warmth, and low-frequency performance while remaining suitable for apartment living. We also compare design, ease of setup, ecosystem compatibility, and the features that have the greatest impact on everyday listening, helping you choose a model that fits both your room and your audio system.
What we need before we start
We need a tape measure/phone app, sample tracks, a phone/mic for sweeps, an amp/AVR if needed, plus willingness to move furniture, tweak settings, and have basic speaker placement familiarity.

Can an Apartment-Sized Compact Subwoofer Deliver Real Bass?
Clarify listening goals and apartment constraints
Do we want punch for movies or subtle bass for music—and how much can our walls tolerate?Define what success looks like for us: theater-level punch for movies, tight extension for bass-heavy music, or simple low-end reinforcement for podcasts and background listening. Let’s assess our priorities upfront so we don’t chase features that don’t matter.
List the concrete constraints and goals so we can compare candidates objectively
Decide our acceptable trade-offs — max SPL, weight, and price — then use those filters to cut the field from dozens to a few sensible compact subs.

Measure the room and plan placement first
Measurements matter—and placement often gives more bass for free than a bigger subwoofer.A Compact Subwoofer placement has a greater impact on bass quality than many people expect. Before purchasing a larger or more powerful model, evaluate your room’s size and acoustics. In many cases, proper placement delivers smoother, deeper, and more balanced bass without requiring additional power or extensive equalization.
Measure your room dimensions. Record the room’s length, width, and ceiling height to estimate how low frequencies will interact with the space. Room size directly affects standing waves, bass extension, and listening consistency.
Document your room layout. Note the location of large furniture, entertainment centers, windows, doors, and the primary listening position. Also record your flooring material, such as hardwood, tile, laminate, or carpet, since each surface reflects or absorbs bass differently.
Consider neighboring rooms and shared walls. If you live in an apartment, condo, or townhouse, identify walls, floors, or ceilings shared with neighbors. Low-frequency sound travels easily through building structures, making placement an important factor for reducing unwanted noise transmission.
Understand room modes before positioning the subwoofer. Small and square rooms often exaggerate certain bass frequencies while cancelling others. Corner placement typically increases output and extension but may also create excessive boominess and stronger vibrations throughout the building.
Test multiple placement locations. Before installing the subwoofer permanently, compare several positions, including:
- Along the front wall
- Beside your entertainment center
- Near a side wall
- In a room corner
- Slightly away from walls or furniture
Walk around the room while playing bass-heavy content. Listen for areas where bass becomes noticeably louder, weaker, or more even. This simple listening test reveals room modes and helps identify the best location for consistent low-frequency performance. Use simple room measurement tools. A smartphone spectrum analyzer, room measurement app, or low-frequency sweep can identify resonances and bass nulls more accurately than listening alone. Even basic measurements make crossover and placement adjustments far easier.
Record
Before moving to the next step, write down:
- Room length × width × ceiling height
- Flooring type (hardwood, tile, laminate, or carpet)
- Large furniture locations
- Primary listening position
- Shared walls, floors, or ceilings
- Potential subwoofer placement locations
Test
Compare bass performance from several locations:
- Mid-wall placement
- Front-wall placement
- Corner placement
- Beside furniture
- Slightly offset from corners
Evaluate each position using music, movies, and bass test tones while listening from your primary seating position.
Decide
Choose the placement that produces the smoothest, most balanced bass before upgrading to a larger subwoofer or applying heavy EQ. In most rooms, optimizing placement provides a greater improvement in sound quality than simply buying a more powerful subwoofer.

Decode the specs that actually predict performance
Ignore marketing fluff—these numbers tell us what will sound good in a small space.Treat frequency response, low‑frequency extension, and usable SPL as meaningful only when measured in‑room — not the glossy numbers manufacturers print. Prefer in‑room measurements or reviews that show real-room curves; a little 6‑inch sub with DSP can outperform a bigger driver in our apartment.
Check distortion figures and amplifier headroom so the sub stays clean at the levels we actually play. Consider whether the unit uses DSP or built‑in room correction — modern mini subs rely on digital tuning more than raw cone area.
Confirm connectivity and controls: LFE, line‑level, or wireless, plus app-driven EQ and phase/level adjustments, because ecosystem features often determine everyday integration.

Match the subwoofer to our speakers and ecosystem
Compatibility beats raw power—we want cohesion, not a sub that fights our mains.Match the subwoofer’s crossover, slope, and voicing to our speakers. Tune so the sub fills in below the speakers’ natural roll‑off instead of overpowering their midbass.
Prefer a compact sealed sub with small bookshelf speakers for tighter, faster bass; consider ported only if we need extra extension and can control room ringing. Favor subs with DSP and phase/level control for tonal continuity.
Choose within a brand ecosystem (Sonos, Denon, etc.) when we want seamless wireless pairing, app EQ, and simple room grouping. If we mix brands, verify line‑level/LFE outputs and a manual crossover so we can align tones.

Prioritize form factor, vibration control, and neighbour-friendly features
Small footprint, big manners—stealthy bass keeps us happy and our neighbors calmer.Prioritize sealed, compact enclosures over large ported boxes; sealed subs give tighter, more controlled bass that matters far more in apartments than headline wattage.
Avoid down‑firing drivers on thin floors; they couple energy into the structure and produce thumps that travel to neighbours — in real setups we’ve seen modest down‑firing subs annoy adjacent units where sealed, front‑firing models didn’t.
Isolate the sub with isolation pads, rubber feet, or corner decouplers. For example, placing a 1″ sorbothane pad beneath a 10″ sealed sub often cuts structure‑borne rumble enough to stop felt vibrations in the hallway.
Check electronics and DSP: listen for electronic hiss and fan noise, and prefer subs with limiters, night modes, or auto‑EQ so we can tame peaks without blasting the building.
Look for

Set up, test, and tune for real-world listening
Quick setup, smarter tweaks—dialing bass is iterative, not instant.Tune and Integrate Your Compact Subwoofer
Proper tuning is what separates a subwoofer that sounds disconnected from one that blends seamlessly with your speakers. Rather than chasing the most bass, focus on achieving balanced, accurate low-frequency performance that complements your room and listening habits.
- Start with your preferred placement. Use the placement tests from the previous section to identify the location that provides the smoothest bass response. Compare front-wall, corner, and slightly offset positions until the subwoofer integrates naturally with your listening position.
- Set an appropriate crossover frequency. Most systems perform well between 80 Hz and 120 Hz, but the ideal setting depends on your main speakers.
- Around 80 Hz for larger bookshelf or floor-standing speakers.
- 90–100 Hz for compact bookshelf speakers.
- 100–120 Hz for satellite speakers or small desktop speakers with limited bass output.
- Adjust the gain gradually. Begin with a conservative volume setting and slowly increase it until bass becomes noticeable without overpowering dialogue, vocals, or midrange detail. A properly adjusted subwoofer should add weight and extension without sounding bloated or boomy.
- Measure your room when possible. Play familiar reference music, movie scenes, or low-frequency sweep tones while using a room measurement application or software such as REW (Room EQ Wizard). Measurements help identify bass peaks, nulls, and resonances that may not be obvious during casual listening.
- Fine-tune phase and equalization. Adjust the phase control and any available delay settings in small increments until bass integrates smoothly with your main speakers. Apply only modest EQ cuts to reduce problem frequencies, and avoid aggressive bass boosts that can increase distortion while making room acoustics worse.
- Listen over several days. Test your settings using different types of content, including music, movies, television, and games. Your ears adapt over time, making it easier to identify whether bass remains balanced across different listening situations instead of relying on a single measurement session.
- Optimize for apartment living. Once you’re satisfied with the tuning, install an isolation platform or isolation feet to reduce vibration through floors. If your receiver or subwoofer supports night mode, dynamic bass management, or output limiters, enable them when listening late at night to reduce the chance of disturbing neighbors.
Goal
The ideal subwoofer setup is one you rarely notice. Instead of calling attention to itself, it should blend seamlessly with your speakers, extending bass naturally while improving the overall depth, warmth, and realism of your audio system.
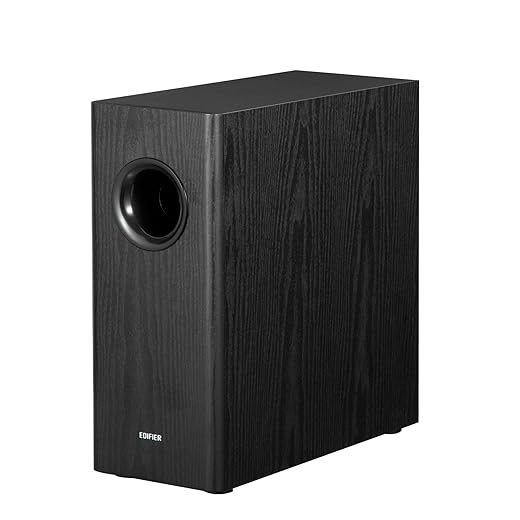
Final verdict: choose context over headline specs
Selecting the right compact subwoofer involves much more than comparing driver size or maximum wattage. The best choice depends on your room dimensions, placement options, existing audio system, connectivity requirements, and the practical realities of apartment or shared-wall living. Features such as digital signal processing (DSP), room correction, ecosystem compatibility, and effective vibration isolation often have a greater impact on everyday listening than raw specifications alone.
Take time to test different placement locations, fine-tune crossover, phase, and volume settings, and focus on achieving smooth, coherent bass that blends naturally with your speakers rather than chasing the highest output numbers. A properly integrated compact subwoofer should disappear into the overall soundstage, adding depth and impact without drawing attention to itself. After you’ve completed your setup, we’d love to hear about your experience and the results you achieved in your listening space.
Frequently asked questions
What should I prepare before I choose a compact subwoofer for apartments?
Start with the checklist in the “What we’ll need” section above—measure your space, confirm compatibility with your gear, and read the full walkthrough once before you change settings or buy parts. Compact subwoofer goes faster when prep is done upfront.
How long does it take to choose a compact subwoofer for apartments?
Most readers finish in about 30–90 minutes if they already have the right parts, but budget extra time for measurements, firmware updates, or a second pass when something does not behave the way the manual suggests on the first try.
What is the hardest part when you choose a compact subwoofer for apartments?
The step that trips people up is usually alignment or configuration—getting measurements, cable routing, or software settings right before you commit. If results still look off, re-check the basics in order instead of swapping hardware immediately.
What mistakes should I avoid when I choose a compact subwoofer for apartments?
Skipping measurements, ignoring ventilation or port limits, and rushing the final test are the common failures. Photograph your starting setup, label cables, and verify the outcome with the same content or workflow you will use every day—not a one-off demo.
When should I call a pro instead of trying to choose a compact subwoofer for apartments myself?
Bring in help when the job needs structural work, licensed wiring, or tools you do not own, or when repeated attempts still fail after you have followed the troubleshooting section. A short paid visit can cost less than replacing gear you damaged by forcing the install.

Princess Rioboca is the Lead Editorial Writer at Option Cutter, bringing over seven years of hands-on experience in consumer technology journalism. Specializing in home networking and smart home architecture, she transforms complex technical data into practical, real-world upgrades. Princess personally tests and audits every product she reviews—evaluating real-world Wi‑Fi throughput, cable management durability, and streaming ecosystem stability—to filter out spec-sheet noise. Her rigorous, field-tested insights are designed to give readers transparent, unbiased buying advice on what to purchase, what to skip, and exactly why.