Calm Wi‑Fi: Setting Up Mesh Without Losing Our Minds
We walk through a calm, design‑forward mesh Wi‑Fi setup that prioritizes user experience, hardware trade‑offs, and ecosystem fit, explaining what changed in recent devices and why those shifts matter so our install is fast, resilient, and future‑proof without losing patience.
What We Need Before We Start

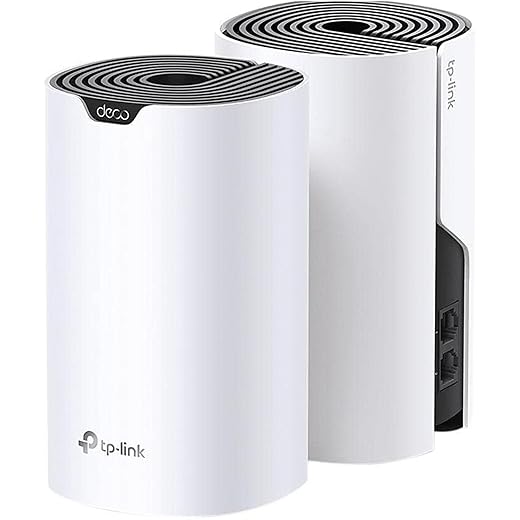
Set Up a Mesh WiFi Network with TP-Link Deco BE25 (Step-by-Step Guide)
Pick the Right Mesh System for Our Home and Habits
Not all mesh is equal — which brand’s ecosystem actually makes life simpler?Decide whether convenience or control drives our install: pick a closed ecosystem (Google, Eero) for seamless smart‑home ties and polished parental controls, or choose a configurable platform (Asus, Netgear) for granular QoS, VPN, and custom firmware.
Compare tri‑band and dual‑band models by real‑world throughput, not marketing claims: prefer tri‑band when our home is large or saturated with concurrent streams because the dedicated backhaul reduces wireless contention; accept dual‑band for smaller apartments where simplicity and price matter.
Evaluate backhaul options: choose wired Ethernet backhaul when possible for predictable speeds; accept wireless backhaul with a dedicated 5GHz band in open‑plan homes. Test app UX and update cadence: pick a vendor whose app simplifies onboarding and pushes timely firmware—security and stability depend on it.
Favor design and size that fit our space: select compact nodes for aesthetics in living areas and beefier units for basements, multi‑story houses, or lots of wired endpoints. Use a quick scenario: if we stream 4K in three rooms and run many IoT devices, lean toward tri‑band with wired backhaul and a power‑user router for long‑term headroom.

Map the House: Strategic Placement Beats Wishful Thinking
What if one relocation could erase three dead zones? Spoiler: it often can.Sketch a quick floorplan and mark rooms we use most: living room, office, bedrooms.
Note construction materials and interference sources—microwaves, cordless phones, baby monitors, and HVAC units—so we avoid dead zones.
Place nodes centrally and elevated; mount or set them on shelves rather than on the floor.
Position one node near each high‑use zone (TV, home office) to boost perceived performance where it matters.
Plan backhaul: prefer wired Ethernet backhaul for predictable speeds and lower latency.
Run Cat5e/Cat6 to strategic nodes when we need consistent 4K streaming or gaming; accept wireless backhaul only in open layouts with a dedicated 5GHz link.
Manage aesthetics and cables: hide power bricks, use short flat cables, and route Ethernet behind trim or in conduit to prevent ad‑hoc placements that kill throughput.
This planning step saves hours of trial and error and leverages product design to deliver consistent coverage across the home.

Unbox, Power Up, and Hook the Primary Node to the Modem
This sounds obvious, but one mistaken cable ruins the day—let’s get it right the first time.Unbox the primary node and keep the supplied power adapter and Ethernet cable; using the manufacturer’s parts preserves expected power delivery and gigabit wiring and avoids subtle speed losses from cheap adapters or poor micro‑USB cables.
Factory‑reset any returned or demo units (hold the reset button ~10 seconds) so we start with a clean firmware state and registration.
Connect the node’s WAN port to the modem’s LAN with a short Cat5e/Cat6 cable; if the ISP device is a gateway, enable bridge/passthrough mode to avoid double NAT (e.g., put an Xfinity/Arris gateway into bridge).
Power the modem first, wait 60–90 seconds, then power the node. Watch LEDs for status:
Test WAN IP on the mesh app to confirm a public IP; smooth hardware setup usually signals a better software/ecosystem experience for long‑term maintenance.

Run the App Setup: From Naming to Firmware
Apps vary wildly—some hold our hand, others hand us a screwdriver. Here’s what to expect.Open the app and follow the guided onboarding. Create an account—choose a local/admin-only option if available; we prefer avoiding forced cloud logins for privacy and offline control. Name SSIDs clearly (example: “Home_Main_5G”) and set a strong, unique password.
Enable automatic updates but install any available firmware immediately. Understand staged rollouts: vendors push updates to subsets first; watch release notes and use the app’s rollback option if a release causes trouble.
Enable common advanced features and configure them sensibly:
Test the app’s diagnostics and mesh map; good UX reduces support calls by making speed tests, logs, and reboots obvious.
Optimize Performance: Backhaul, Channels, and QoS
Want buttery streaming? We tune the parts you actually notice, not just raw Mbps.Remember vendors auto‑tune these settings, but manual tweaks still win when neighbors and legacy devices make the real world messy. Aim for fewer drops, lower latency, and consistent throughput where it matters.

Secure, Integrate, and Maintain: Make It a Set‑and‑Forget Network
Security and maintenance aren’t sexy, but they’re what keeps our Wi‑Fi working in the long run.Enable WPA3 where supported, lock the admin account with a unique password, and set up two‑factor authentication for any cloud‑based management. Protecting the control plane matters more now that vendors push remote features.
Isolate devices during onboarding: put cameras, smart plugs, and guest phones on a guest SSID or VLAN so they can’t reach our laptops or NAS. Name devices consistently in the app so we can spot odd behavior.
Schedule firmware updates and export a config backup after major changes. Run quick monthly checks — speed tests in problem rooms, ping tests for latency, and a node reposition if coverage dips.
Watch vendor update cadence and ecosystem compatibility — slow or closed vendors become a recurring annoyance.
Wrap‑Up: Why This Approach Saves Time and Headaches
We prioritized planning, ecosystem fit, and tuning to deliver consistent, secure Wi‑Fi; this design-aware setup reduces maintenance, adapts to new devices, and beats one-size-fits-all chaos. Try it, tell us how it went.

Chris is the founder and lead editor of OptionCutter LLC, where he oversees in-depth buying guides, product reviews, and comparison content designed to help readers make informed purchasing decisions. His editorial approach centers on structured research, real-world use cases, performance benchmarks, and transparent evaluation criteria rather than surface-level summaries. Through OptionCutter’s blog content, he focuses on breaking down complex product categories into clear recommendations, practical advice, and decision frameworks that prioritize accuracy, usability, and long-term value for shoppers.