A single upgrade that actually shifts how a room feels
Small rooms feel cramped for predictable reasons: low ceilings, heavy shadows, visual clutter, and a lone overhead fixture that flattens depth. We’ve found a single, practical upgrade that delivers more consistent results than repainting or rearranging: layered, tunable lighting with low‑profile fixtures and coherent controls.
We’ll show what that upgrade actually is, how light sculpts perceived space, and how to choose hardware and an ecosystem that works with your home. We’ll also cover planning, placement, installation, and realistic costs. Our approach is pragmatic and evidence‑driven: we care about user experience, design tradeoffs, and how modern smart lighting ecosystems change what’s possible — and affordable — today.
We explain not just options, but outcomes.


Make Tight Rooms Feel Instantaneously Bigger
How light sculpts perceived space
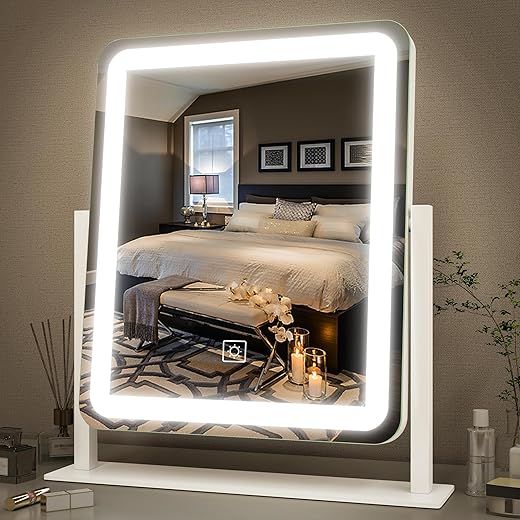
We start from a simple, often-overlooked principle: the way a room is lit changes how big it feels. Light isn’t just brightness; it’s direction, contrast, shadow, and color. When we treat lighting as a single overhead source, surfaces flatten, texture disappears, and the room reads as one plane — compact and claustrophobic. Swap that one source for layered, directional light and the same square footage suddenly breathes.
Depth through contrast and direction
Shadows define edges. Wall-washing — a band of light that grazes a vertical surface — reduces the harsh boundary between wall and ceiling and makes walls recede visually. Uplighting in a corner lifts perceived ceiling height. Accent lights separate planes: a dedicated task lamp creates a bright foreground while a dimmer, warmer wall wash provides depth behind it. Together, these contrasts trick the eye into reading multiple spatial layers instead of one flat volume.
Practical how‑tos (placement and intent)
Color temperature, CRI, and finishes
Cooler whites (3500–4000K) can feel more open and crisp, but they can also read as clinical on warm wood or textured plaster. A tunable white (2700–4000K) gives us the flexibility to dial openness during daytime and warmth at night. Prioritize CRI 90+ where materials matter; high-CRI LEDs render texture and color accurately, which preserves the cues our brain uses to interpret space.
Why this matters now
Smart, low-profile fixtures and tunable drivers are widely affordable, and ecosystems now let us coordinate layers easily. The payoff is immediate: people move differently in a room that reads as larger — they sit farther back from a sofa, they use corners as reading nooks, and clutter feels less oppressive. In the next section we’ll look at the hardware and systems that make these effects easy to set up.
What the upgrade actually is: layered, tunable lighting and low-profile fixtures
What we mean by “layered” in practice
Layered lighting is not a rubric — it’s a cookbook. At minimum we want three independent elements:
Putting those three on separate controls (or scenes) is the point: we can dim the ambient to reveal the accent, or boost task light without flattening the space.
Typical fixtures and hardware to picture
Think low-profile, mostly hidden sources that sculpt rather than shout:
We choose low-profile forms because they push light onto surfaces rather than clutter sightlines — that’s half the illusion of space.
Controls: dimmers, scene switches, and smart controllers
Good controls are simple: a dimmer for each layer, scene recall, and optional automation. We recommend:
The ecosystem choice affects how seamless the experience feels: native wired dimming gives smooth local control; a smart hub unlocks quick scene recall and schedules.
Quick setup tips that actually save time
Next we’ll walk through how to select hardware that fits your home — what standards to pick, and when to favor pro installation over DIY.
Choosing hardware and an ecosystem that plays well with your home
We’ve talked about the “what” — layers, low profiles, tunability. Now we need to pick the plumbing: fixtures are only half the story; the ecosystem determines reliability, interoperability, and long‑term value. Here’s how we evaluate that trade-off in practical terms.
Protocol compatibility: pick a future‑proof spine
Start with the wireless language your house will speak. Zigbee and Thread create robust low‑power meshes ideal for sensors and many light products; Thread’s native IP stack makes it especially Matter‑friendly. Matter is the big compatibility story — it lets devices from different brands talk consistently. Wi‑Fi bulbs are tempting (no hub), but they add dozens of endpoints to your router and can be less resilient.
A simple rule: prefer Matter/Thread capable products where available, Zigbee when Thread options aren’t practical, and Wi‑Fi only for a few isolated smart bulbs or cameras.
Hub vs direct‑to‑Wi‑Fi: reliability and control
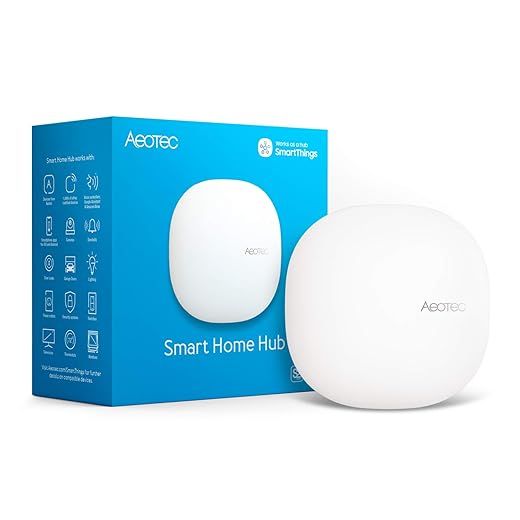
Hub-based systems (Hue Bridge, SmartThings, Lutron Smart Bridge) centralize traffic, provide local scenes, and tend to survive internet outages. They also enable hardwired wall‑switch integration and stable dimming. Direct‑to‑Wi‑Fi or Bluetooth devices (cheap bulbs, plugs) are simpler to start with but can be flaky in larger setups and harder to unify into scenes.
Voice, apps, and physical controls that actually get used
We judge systems by daily friction: app polish, scene latency, and whether guests can use your setup without installing an app. Apple HomeKit and Lutron excel at local, fast control; Hue offers the smoothest color tooling; Google and Alexa are broadly compatible. Don’t overlook physical controls — wired dimmers or battery‑free Pico switches (Lutron) make the whole system feel professional.
Quick buyer’s guide: who should choose what
Practical tip: map which rooms need local hardwired control and which can rely on wireless devices before you buy. Next, we’ll turn those choices into a concrete installation plan — placement, wiring, and when to call a pro.
Design and installation: planning, placement, and whether to DIY
A great lighting plan fails if it’s executed poorly. Here we move from product choices to practicalities: where lights belong, how they should be aimed, and which installation path matches your risk tolerance and budget. We’re aiming for predictable, repeatable results you can actually live with.
Placement rules of thumb for small rooms
Downlights: space recessed cans at roughly half the ceiling height to half again — so an 8‑ft ceiling typically takes fixtures about 4–6 ft apart. Keep the outer row of lights 3–4 ft from walls to avoid bright rings or dark edges.
Wall‑wash: to get smooth vertical illumination, place washers about 10–18 inches from the ceiling and roughly 1/3 of the ceiling height away from the wall (an 8‑ft ceiling ≈ 2.5 ft). That geometry helps the beam graze the surface and reveal texture without hot spots.
Cove and strip runs: route the LED strip where the light can hit a ceiling or upper wall at a shallow angle — a continuous perimeter channel with a 2–3 in. reveal gives the soft, floating effect that visually expands a room. Use aluminum profiles with diffusers for even light and heat management.
Beam angle basics: narrow beams (15–30°) for accents, medium (30–45°) for task/reading areas, and wide (60°+) for general fill. In small rooms we rely more on wide and medium beams with a couple of narrow accents to create depth.

Installation pathways: renter to full‑integration
Retrofit (renters): smart bulbs and plug‑in LED lamps are lowest disruption. They’re instant, reversible, and now offer decent tunability — good for testing layouts before committing.
Mid‑level swap: replace existing cans with dimmable LED recessed kits (Halo, Juno, Lithonia) or slim LED panels. These reduce glare, improve color rendering, and integrate with smart dimmers. Expect a day or two of work per room and a modest electrical swap if you add dimmers.
Full rewire / integrated controls: cutting channels for hidden coves, adding in‑wall smart modules (Lutron Caseta, Legrand), and running low‑voltage control wiring needs planning, permits, and an electrician. This is where you get seamless scenes and local control — and where costs and disruption rise.
When to call an electrician:
Expect a pro job to take a few days for a single room, longer if drywall and painting are needed; lead times for custom cove profiles or high‑end fixtures can be several weeks. Coordinate switch heights (typically 42–48 in. from floor), finish trims, and dimmer compatibility up front so the lighting reads as intentional — not an afterthought.
Next we’ll translate these options into the money and trade‑offs you should expect.
Cost, trade-offs, and what real rooms actually gain
We know upgrades live or die by budgets and expectations. Below we break the work into approachable tiers, call out the real trade‑offs (energy, failure points, friction), and tell you when lighting is — and isn’t — the best first move.
Tiers and expected outcomes
Energy, maintenance, and failure modes
LEDs cut operating load dramatically — a 10–12W LED downlight replaces a 60–75W incandescent. Expect low yearly energy bills, but budget for driver replacements and dimmer/firmware compatibility. Common failure points:
Plan for replaceable drivers, accessible strip channels, and dimmers rated for LED loads.
Learning curve and control friction
Scenes and tunable color temperature add power — and complexity. We’ve seen elegant setups become annoying when everyone in a household can’t find the right scene. Best practice: pick one control ecosystem (Lutron or Hue), create a few labeled scenes (Morning, Movie, Clean), and set physical switches to fallback states.
When lighting is the most effective lever — and when it isn’t
Lighting is the fastest way to expand perceived volume when ceilings, walls, or visual clutter are the issues. Choose other priorities first when:
If you’re staging for resale or photography, layered lighting is often the single best improvement short of reconfiguring the plan—especially in tight interiors.
Next we synthesize these practical takeaways and the qualitative gains you can expect into a final verdict.
A measured upgrade with outsized returns
If we had to pick one single intervention that reliably makes a small room feel larger, it’s a layered, tunable lighting strategy tied to a dependable control ecosystem. It’s not the cheapest or simplest fix, but in today’s market—where smart fixtures, low‑profile hardware, and robust protocols (Zigbee, Matter, Thread) compete on interoperability and user experience—it yields immediate perceptual gains, flexible scenes, and long-term design value.
Start by sketching a basic lighting plan, decide whether you want local switches, app control, or voice, and then choose whether to DIY or hire an electrician for layout and wiring. Do this first and the rest of the room’s upgrades fall into place. Let’s make rooms feel bigger.

Chris is the founder and lead editor of OptionCutter LLC, where he oversees in-depth buying guides, product reviews, and comparison content designed to help readers make informed purchasing decisions. His editorial approach centers on structured research, real-world use cases, performance benchmarks, and transparent evaluation criteria rather than surface-level summaries. Through OptionCutter’s blog content, he focuses on breaking down complex product categories into clear recommendations, practical advice, and decision frameworks that prioritize accuracy, usability, and long-term value for shoppers.