Why a small upgrade can make desks feel new again
Cable clutter is one of those background frictions that quietly makes a workspace worse. We notice it in tiny daily annoyances: snagged cables, dust traps, and the mental clutter when things don’t look tidy. Fixing that mess is not about vanity. It affects ergonomics, device longevity, and how smoothly our workflows move.
In this piece we test practical upgrades that change the day-to-day. We judge solutions by four things: ease of installation, everyday reliability, integration with existing setups, and value. We focus on user experience, design, and how each option fits into a broader ecosystem. Our goal is simple: give you choices that make desks feel new again without complexity.


Master Cable Management: Simple Tips for a Clean, Efficient Setup
The problem: what messy cables actually cost you
Hidden costs: time, safety, and equipment wear
Messy cables aren’t just an aesthetic gripe — they’re a recurring productivity tax. We lose minutes each time we fumble for the right charger, unplug the wrong device, or detangle a knotted bundle before a call. There’s a tangible safety angle too: trailing power cords create trip hazards, and under-desk chaos makes it easy to pull a laptop or monitor off a stand by accident. On the equipment side, repeated bending at connectors shortens cable life, and dust accumulation around plugs and vents accelerates wear.
A quick real-world example: we once watched a desk-mounted monitor wobble as someone tugged a keyboard cable that had been routed improperly. The connector bore the brunt; replacing both cable and dock added unnecessary cost and downtime.
The psychological tax
Beyond physical costs, there’s cognitive overhead. Cluttered visual fields increase distraction and decision friction; when our desk looks messy, we’re less inclined to keep it organized. Conversely, a tidy cable layout reduces small, nagging distractions and makes it easier to adopt other good habits — like regular cleaning or quick reconfigurations for new peripherals.
What our upgrade needs to solve
From a design and UX standpoint, any useful cable solution must meet measurable goals so we can judge real impact:
Quick practical tips we use
These are the user-facing problems any upgrade must address. Next, we test solutions that meet these goals while fitting into real desks and workflows.
The practical upgrade: what to look for in a cleaner cable solution
Core components to prioritize
When we think about an upgrade that actually gets used, four elements matter: modular channels and desk mounts, flexible sleeving, quick‑release anchor points, and accessible power distribution that keeps bricks off the floor. Modular channels let us route runs neatly and change layout without a full teardown. Flexible sleeving bundles multiple cords but still bends around monitor arms. Quick‑release anchors make swapping a keyboard, headset, or phone charger a ten‑second job. And a tidy, under‑desk power bay keeps chargers ventilated and accessible.
Design trade‑offs: permanence versus flexibility
We weigh permanence against flexibility in every purchase. Permanent installations — routed channels screwed under the desk — look clean and are secure, but they’re a pain if you change desks often or need to add ports. Removable clamps and no‑drill channels are friendlier for renters and hot‑desking; they’re slightly less rigid, but the convenience often wins. Similarly, minimal solutions (a single sleeve) look elegant but quickly hit capacity. If your setup includes a dock, two monitors, and peripherals, choose a system with higher capacity or modular add‑ons.
Materials and attachment methods that matter
Material choice affects longevity and feel. Rigid aluminum or reinforced ABS channels resist sag and protect plugs; woven nylon sleeves balance abrasion resistance with flexibility. For attachment, we prefer a hierarchy: mechanical clamps for standing desks (they handle movement), screw mounts for permanent setups, and high‑quality adhesives for smooth, stationary surfaces. Avoid low‑tack tapes — they fail after heat cycles.
Ecosystem fit: how it works with what you already own
A cable solution is only as good as how it integrates. Check for pass‑throughs sized for USB‑C power bricks, enough clearance for monitor‑arm grommets, and slack management for sit‑stand desks. Look for anchor points that accept common peripheral cables and docks, and a power bay design that fits standard power strips without blocking ventilation. In practice, we choose systems that let a dock sit nearby, route monitor DisplayPort/HDMI discreetly, and give USB‑C PD cables a short, direct run.
Practical choices here determine how often we’ll actually maintain the setup — and they set the stage for the next section, where we walk through installing and living with the upgrade.
Installing and living with the upgrade: a user-focused walkthrough
We walk through a straightforward install that actually survives daily life. The goal: few tools, predictable paths, and a system that makes swapping gear painless.
Pre‑install planning: map ports, measure, and margin
Start by sketching what plugs where — monitor power and video, dock or laptop power, USB hubs, and peripherals. Measure cable lengths from device to the intended channel or power bay and add 20–30% slack for sit‑stand movement and swapping. Make a short checklist:
This upfront map prevents buying the wrong channel size or ending up with a bunched mess behind the desk.
Surface‑friendly mounting tips
We favor reversible attachments for most desks. Clean the surface with isopropyl alcohol, mock‑place components with painter’s tape, then use high‑quality adhesive strips (3M VHB or Command strips) for smooth laminate and ABS raceways. Reserve screws for heavy, permanent runs or standing desks — use rubber washers to protect veneer. For textured or painted surfaces, use clamp mounts or a thin plywood backing to spread pressure.
Reconfiguration strategies: labels, color, and quick release
Design for change. We label both ends of cables with heat‑shrink labels or a small printed tag, and use color‑coded Velcro straps for device groups (green = audio, blue = display, red = power). Adopt at least one quick‑release point: magnetic cable anchors or modular desk grommets let us unplug in seconds. Keep a small pouch of spare ties and an adhesive anchor under the desk.
Recommended quick wins:
How it changes day‑to‑day — and common friction points
Once installed, desk resets take minutes, not hours. Troubleshooting is easier because we can trace a single tidy run. Swapping laptops is a one‑plug affair when docks and USB‑C runs are front‑facing.
Watch for:
Thoughtful design — oversized channels, modular anchors, and accessible power bays — turns cable management from a recurring chore into a background convenience, ready for the next upgrade.
Where it fits in the ecosystem: comparing alternatives and trade-offs
We put the upgrade from the previous section into a competitive context so you can pick a solution that matches how you actually use your desk. Below we walk through common approaches — what they cost you in design, permanence, aesthetics, and upkeep — and when one makes more sense than another.
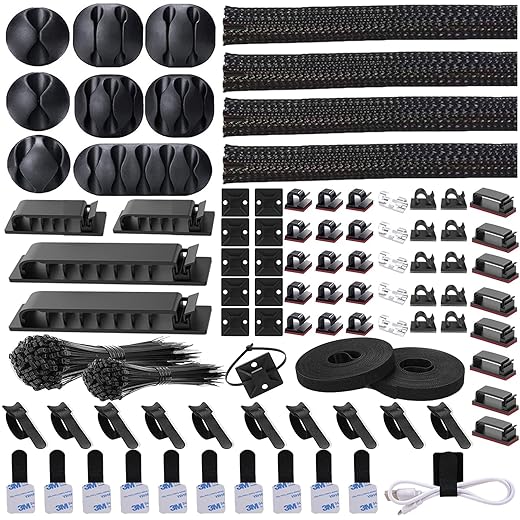
Adhesive clips: fast, cheap, reversible
For quick wins and rental setups, adhesive clips (think 3M Command Cable Clips) are hard to beat.
Use them when you have one or two cables to tame, or you need a solution that won’t damage surfaces. They’re not ideal for power bricks, high-traffic areas, or multi-device desks.
Under‑desk trays and J‑channels: the everyday sweet spot
Under-desk trays and open J-channels balance capacity, aesthetics, and access. They hide a cluster without over-committing to a permanent install.
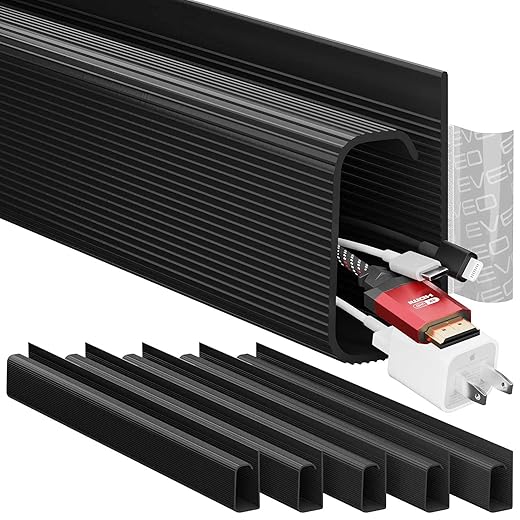
This is the pick for most people upgrading from clips: roomy enough for a power strip, easy to reorganize, and unobtrusive beneath the desk.
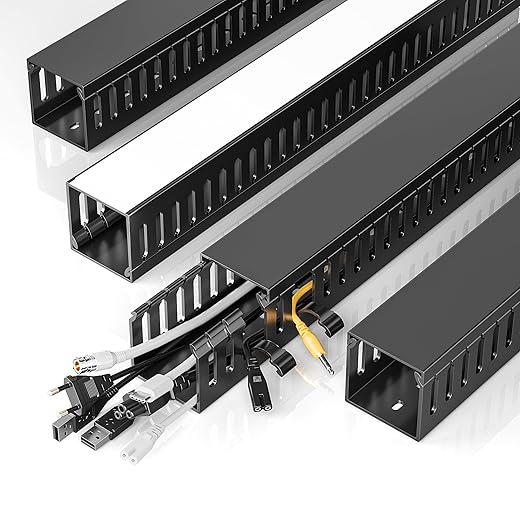
Full cable raceways: polished, permanent, high-capacity
Surface raceways (Legrand Wiremold, D-Line) and paintable wall channels are the solution when aesthetics and permanence matter.
Choose raceways for home offices, media walls, or studio installs where you want everything invisible and will live with the layout for years.
DIY: flexible, cheap, variable quality
DIY approaches — 3D-printed channels, PVC conduit, or repurposed trim — give you control but carry trade-offs.
If you enjoy making and tweak often, DIY can be satisfying. Otherwise, modular commercial solutions usually save time and give a cleaner result.
Which matches you? Minimalists and renters lean toward clips; everyday knowledge workers find trays/J-channels the most practical; power users, home studios, and anyone after a built-in look should budget for raceways. Keep in mind capacity, reversibility, and how often you change gear — those three factors should drive the choice.
Value over time: durability, sustainability, and future-proofing
We’ve walked through what works today; here we look at how to make an upgrade worth years of use. The choices we make about materials, modularity, and parts availability determine whether a cable solution becomes a permanent improvement or a short-lived gadget.
Materials and build: what lasts
Stiffer materials and simple mechanics beat clever gimmicks over time. Powder‑coated steel brackets and thicker ABS or PVC channels resist sagging and yellowing; cheap flimsies warp within a season. Look for rated fire‑resistant plastics if you’re running power strips. Prefer screw‑mount points or proven adhesive systems (3M Command-style rated for electronics) over single-use glue — they make removal and reinstallation painless.
Modularity and repairability: adapt, don’t replace
We prioritize systems that come apart. Snap-on lids, replaceable end caps, and standardized mounting holes mean a broken clip or cracked section is a quick swap, not a full teardown. When shopping, ask whether vendors sell spare lids, clips, or extension pieces. A $5 replacement part that’s easy to order is worth more than a cheaper, disposable product.
Expandability: plan for new devices
Design for growth: pick channels with extra capacity and removable lids, and route with service loops so you can add monitors or a dock later. A simple rule: add 20–30 percent headroom to your measured cable volume. If you expect a gaming rig, extra width matters; for a laptop+phone setup, slim modular channels are fine. Modular ecosystems let you bolt on an extra segment instead of redoing the whole run.
Resale, lifecycle, and market signals
Tidy, modular setups are easier to move between desks and fetch higher resale value because buyers inherit a usable system. Companies that sell replacement parts and expansion modules — instead of “single-use” all-in-one kits — tend to support customers longer and reduce waste. When evaluating brands, we look for clear spare‑parts listings, multi‑year warranties, and a track record of product continuity.
Practical takeaway: choose sturdy materials, demand modularity, and confirm spare-part availability. That mindset keeps costs, labor, and environmental impact down as your setup evolves — and it sets us up to decide which specific upgrade to recommend next.
A practical verdict: make the upgrade you’ll actually use
We recommend a modestly priced, modular system that favors ease of install, simple reconfiguration, and durable materials over theatrical cable trays. That choice improves daily workflow, reduces friction when devices change, and fits into broader desk ecosystems. It’s not about perfection but predictable, low-effort wins.
Buy compatible, modular systems with replaceable parts and simple mounts so upgrades stay incremental and repairable. Base the purchase on how it changes our daily workflow; choose usefulness over novelty, and we’ll enjoy a tidier, longer-lasting workspace that endures as our devices evolve without extra fuss.

Chris is the founder and lead editor of OptionCutter LLC, where he oversees in-depth buying guides, product reviews, and comparison content designed to help readers make informed purchasing decisions. His editorial approach centers on structured research, real-world use cases, performance benchmarks, and transparent evaluation criteria rather than surface-level summaries. Through OptionCutter’s blog content, he focuses on breaking down complex product categories into clear recommendations, practical advice, and decision frameworks that prioritize accuracy, usability, and long-term value for shoppers.