
Why the smallest change can make your calls feel polished
Most of us spend hundreds of hours a year on video calls using devices that were never meant for close-up scrutiny. We tolerate flat faces, noisy backgrounds, and tired-looking skin because a full tech overhaul feels expensive and time-consuming. Yet a single, focused improvement can shift how others perceive us and how we feel on camera.
In this piece we take a practical, design-forward look at that minimal upgrade: what it buys you, how it fits into today’s ecosystem of webcams, lights, and meeting platforms, and why it delivers more ROI than swapping microphones or upgrading your laptop. We want actionable advice — not gadget fever — so you walk away with a clear, affordable next step.


What’s really wrong with typical video-call setups
Phones and laptops weren’t built for headshots
Most front-facing cameras are tiny, low-power sensors buried inside ultra-thin bezels. That matters: small sensors struggle with low light, producing flat, grainy images and blown highlights when a window sits behind us. Even expensive machines—think MacBook Air or a Galaxy S-series selfie—trade dynamic range and color fidelity for battery life and size. The result is an image that feels unpolished, not because of our faces, but because the hardware compromises for thinness and power efficiency.
Lighting and color get left to chance
Auto white balance and exposure algorithms try to guess what looks “right,” and they fail often. Warm tungsten lamps can make us look jaundiced; fluorescent office lights create harsh shadows. Those shifts change perceived age, energy, and competence in an instant—research shows visual cues drive trust and attention in remote meetings. A quick fix like even, frontal light dramatically reduces the camera’s workload and improves skin tone, focus, and contrast.
Backgrounds, compression, and attention
Messy or busy backgrounds force viewers’ eyes to wander. Video codecs aggressively compress low-detail faces while preserving high-contrast motion, so a patterned backdrop causes blockiness and distraction. Virtual backgrounds and blurs help, but they can introduce artifacts and weird edge detection—another thing that undermines credibility.
Sound that contradicts the image
Finally, audio frequently fights the picture. A distant laptop mic makes us sound hollow and far away while our face appears close. That mismatch increases cognitive load for listeners and accelerates meeting fatigue.
We see these as user-experience failures: each one erodes engagement, shortens attention spans, and subtly undermines perceived competence. The good news is these are deliberate design trade-offs by device makers—and they point to one high-leverage remedy we’ll unpack next.
How we define the “easiest” upgrade
What “easy” actually means for real people
Not every improvement is equal. For most of us—busy knowledge workers, parents on the go, small-business owners—the ideal upgrade is something we can buy, set up, and forget about. We therefore judge options by practical criteria that matter in day-to-day use.
Five practical criteria
We measure “easiest” by:
These priorities push us toward fixes that work with the cameras people already own—laptops and phone cameras—rather than recommending a full hardware swap. A new webcam or microphone can help, but we focus on changes that scale across devices and conferencing ecosystems; that’s what makes the advice useful for a broad audience.
Why this framework matters
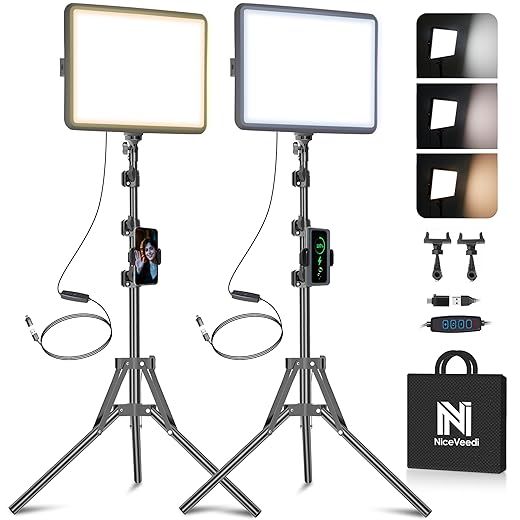
In practice that means favoring lighting and placement solutions over device replacement. LED panels, diffused ring lights, or even an inexpensive clamp lamp plus a simple diffuser deliver big visual improvements, immediately reducing camera noise and forcing auto-white-balance to behave. They’re usually USB-powered or mains-ready, require a few minutes to position, and need no software updates—exactly the sort of low-maintenance wins we want.
Next we’ll pick the single upgrade that best matches these criteria and explain how it changes the whole call experience.
The single easiest upgrade that changes everything
Why lighting beats swapping cameras (most of the time)
We tested the obvious fixes—buying a nicer webcam, upgrading a mic—and they help in narrow ways. Lighting, however, improves every camera, every app, and every caller. A small, well-placed light changes how your laptop or phone sensor exposes skin tones, reduces digital noise, and gives your face depth and catchlights that read as engagement. In short: it’s the single tweak that lifts video quality across the board without driver installs or repeated settings fiddling.
The optics in plain English
Cameras are lazy: in low light they increase gain (ISO) and lower shutter speed, which creates grainy, soft images. More and better light lets the sensor use a faster shutter and lower gain. The result is:
This is why a $30 diffused lamp can make a $1000 laptop webcam look far better.
Quick wins — how to make lighting work right now
Design and ecosystem advantages
Lighting integrates with desk arms, tripods, smart plugs, and conferencing workflows. It scales from a $20 clamp lamp and diffuser to consumer panels like the Elgato Key Light for streamers, and it plays nicely with any mic, webcam, or phone. That combination of low hassle and broad compatibility is why lighting is our top pick.
Next, we’ll walk through how to choose the right lighting gear for your exact room and setup.
How to choose the right lighting gear for your space
We break the buying decision into practical trade-offs so you don’t buy a shiny toy that doesn’t fit your desk, power, or room. Here’s how we weigh the options.
Light type: ring, panel, or softbox
Ring lights give even, flattering catchlights for single-person desks but can look flat. Flat LED panels (Elgato Key Light-style) are versatile: easy mounting, even output, and good control. Softboxes create the softest light for home studios but need more space and stands. Choose a type by the look you want and the space you have.

Size and mounting
Pick a size that fits your desk distance: small 6–10″ panels for close-up laptop setups; 10–20″ for more head-and-shoulders coverage. Mounting options matter—desk-arm clamp, cold-shoe, or standard 1/4″-20 tripod threads. If you already have a monitor arm or boom, make sure the light can clamp or adapt to that rig.
Color temperature and tunability
We prefer bi‑color (3200–5600K) so you can match existing room light or daylight. Tunability matters: being able to dial warmth or coolness saves time and gives a natural skin tone under mixed lighting.
CRI and color accuracy
Aim for CRI 90+ (or TLCI 90+)—lower CRI makes skin look flat or splotchy. Better color accuracy reduces time fiddling with white balance in apps.
Brightness (lux) targets
Practical targets at face level:
Battery vs plug-in
Battery and USB-C power offer portability for hybrid rooms; mains power is steadier and brighter. If you stream long calls, prefer plug-in panels; for mobile setups, choose USB-C battery-backed models.
Price tiers at a glance
With those selection rules, we’re ready to set the lights where they matter—next we’ll run through practical setup tips that make lighting actually work.
Practical setup tips that make lighting actually work
We’ve picked the right light — now let’s make it behave. These are the hands-on moves we use to get a consistent, flattering image in small rooms, with cheap kit or a compact Elgato Key Light.
Placement: distance, angle, and height
Place your key light slightly above eye level and angled down 15–30°. Aim for a 30–45° offset from camera axis (not dead-on) to model the face without deep shadows. For compact panels (Elgato Key Light, Lume Cube Panel Mini), start 1.5–3 ft from your face; larger softboxes can sit 3–6 ft back. Closer = softer falloff and fewer shadows; farther = more even room illumination.
Soften without drama
Soft light is the secret to professional-looking skin. Use a softbox or diffusion panel; household hacks (parchment paper, a white bedsheet over a frame) work in a pinch. Bounce off a nearby white wall or ceiling for flattering, wraparound light — the Neewer 660 with a cheap softbox does this well. Avoid un-diffused LEDs that create hard cheek shadows and specular hotspots on glasses.
Mini three-point lighting
You don’t need three stands. For desks:
A Lume Cube or small ring light makes a great rim light when clipped to a shelf.
Camera and exposure tricks
Set manual white balance if possible, or lock auto-WB after getting a neutral card in frame. Watch highlights in your preview — if skin is clipping, lower LED brightness before dropping camera exposure. If auto-exposure hunts, give the camera a stable reference: temporarily point the camera at your face and lock exposure (or use exposure compensation in webcam apps).
Platform nudges
Zoom and Meet compress gradients, so avoid tiny specular highlights and noisy backgrounds. Teams is slightly kinder to dynamic range. For virtual backgrounds, get clear separation with a rim light and a softly lit, low-clutter backdrop — compression loves simplicity.
Quick checklist before a call: soft catchlight in your eyes, no clipped highlights, subtle rim separation, and a previewed thumbnail that looks natural.
When lighting isn’t enough: complementary upgrades and trade-offs
Lighting moves the needle for most calls, but it doesn’t solve every problem. Once your face looks right, other flaws—poor framing, muffled voice, or jittery phone cameras—become obvious. Here’s how we think about sensible follow-ups, and how to pick what to add next.
External webcams: better optics and reliable autofocus
If your laptop camera crops badly or hunts for focus, an external webcam is the fastest fix. Choices range from the Logitech Brio (4K, strong HDR) to the Elgato Facecam (good low-light, sharp image) and the Razer Kiyo Pro (wide dynamic range). Prioritize sensor quality and exposure stability over gimmicks; higher resolution only matters if your platform supports it.
Microphones: clarity vs. setup complexity
A dedicated mic improves intelligibility more than any headset. USB mics like the Blue Yeti are plug-and-play; for podcasters and frequent presenters, the Shure MV7 (USB/XLR) or a dynamic option like the FIFINE AmpliGame AM8 USB/XLR Dynamic Microphone offer a cleaner, more present voice and handle room noise better than built-ins. Expect to trade simplicity (USB) for flexibility (XLR + mixer/interface).

Use your phone as a webcam when space is tight
Phone cams can outperform cheap webcams. Apps like Camo, EpocCam, and DroidCam turn a spare phone into a high-quality camera. Watch for battery drain, mounting stability, and app compression—wired connections are usually more reliable than Wi‑Fi.
Software fixes and their costs
Noise suppression (Krisp, built-in Zoom filters), virtual backgrounds, and portrait-mode blurs fix problems without new hardware. They can tax your CPU/GPU (NVIDIA Broadcast needs an RTX GPU) and sometimes introduce artifacts, so test before relying on them.
How to prioritize (quick guide)
Next, we’ll wrap up what that small change delivers and why it’s worth the effort.
A small change, big payoff
For most of us, lighting is the highest-return, lowest-friction upgrade for video calls: it fixes the single biggest visual problem across webcams, laptop cameras, and phone setups, and it plays nicely with whatever ecosystem we already use — Zoom, Teams, Meet — without software magic. Start modestly: a clamp lamp with a diffuser or a small bi-color panel buys you consistent skin tones, perceived sharpness, and fewer distracting shadows, which matter more to how we read faces than megapixels do.
Iterate from there only as workflow demands: better audio or a stronger camera help, but they compound gains rather than replace them. Try one reversible tweak this week and judge by meeting-quality, not specs instead.

Chris is the founder and lead editor of OptionCutter LLC, where he oversees in-depth buying guides, product reviews, and comparison content designed to help readers make informed purchasing decisions. His editorial approach centers on structured research, real-world use cases, performance benchmarks, and transparent evaluation criteria rather than surface-level summaries. Through OptionCutter’s blog content, he focuses on breaking down complex product categories into clear recommendations, practical advice, and decision frameworks that prioritize accuracy, usability, and long-term value for shoppers.