Menu

The Most Underrated Upgrade for Gaming Setups

Yogesh Kumar / Option Cutter
Picture of By Chris Powell
By Chris Powell

Why we think one small change reshapes every gaming desk

We make a deliberately contrarian claim: the single most underrated upgrade for a gaming setup isn’t the latest GPU, an ultrawide monitor, or an exotic mechanical keyboard — it’s the monitor arm. We’ll explain how an inexpensive, well-chosen mount transforms ergonomics, desk real estate, immersion, and visual alignment in ways that ripple through every session.

Too many desks are cluttered with monitors perched on stock stands, mismatched bezels, and awkward sightlines that force neck strain and ruined immersion. That’s a design and UX failure, not a hardware inevitability.

A good arm reclaims space, aligns panels for multi-monitor accuracy, permits seamless height and angle adjustments, and elevates peripherals into a unified ecosystem. It’s cheap relative to GPUs yet addresses the day-to-day friction that actually shapes how we play, stream, and work. In this piece we analyze ergonomics, build quality, integration, and cost-benefit tradeoffs to show why this small change punches above weight.

Best Value
WALI Single Gas-Spring Monitor Arm, Adjustable
Great reach and tilt for ergonomic setups
We find the WALI gas-spring arm gives broad adjustability and a 26.4 lb capacity, making it a practical upgrade for 17–34″ flat displays and many curved panels. Its dual clamp and grommet mounting plus easy setup deliver the flexible, no-friction experience you’d expect from pricier arms, which matters if you want professional ergonomics without a big investment.
Amazon price updated April 23, 2026 2:44 pm
Prices and availability are accurate as of the last update but subject to change. I may earn a commission at no extra cost to you.

Top 10 Gaming Setup Accessories You Need Now

1

The user-experience gains: ergonomics, sightlines, and immersion

Ergonomics that actually change how we play

We’ve found the simplest wins in ergonomics come from putting the center of the screen where our eyes naturally rest. A monitor arm makes that immediate: instead of craning up or slumping forward, we can set the top of the panel roughly 2–3 inches below eye level, tilted down 5–10°. That small change reduces neck rotation and shoulder tension over multi-hour sessions, and it’s easier to maintain a neutral posture — which matters when every millimeter of head movement affects aim in competitive play.

Arms also remove the need to fight monitor OSD menus or prop up screens with books. A quick tilt or swivel eliminates glare from windows or room lights far faster than fiddling with brightness and contrast.

How sightlines improve performance and immersion

Proper sightlines go beyond comfort; they affect perception. When our heads, eyes, and the screen plane are aligned, perceived motion blur drops and tracking feels steadier. In practice we notice fewer micro-corrections in FPS aim and smoother pans in flight sims simply because our seating posture is stable and our view isn’t skewed by an off-angle monitor.

For immersion, a centered ultrawide fills peripheral vision without distortion if the curvature and angle are matched to our sitting position. For multi-monitor setups, arms let us arc side panels so they’re natural extensions of our forward view — less “monitor hunting,” more situational awareness.

Best for Multitasking
HUANUO Dual Full-Motion Monitor Arm, Clamp/Grommet
Best for dual-screen gamers and multitaskers
We like HUANUO’s dual arm for its confident dual C-clamp base, wide motion range, and tidy cable management that clears desk real estate for keyboards and docks. It competes well with midrange dual mounts, but its wooden-desk recommendations and thickness constraints mean you should verify compatibility with nonstandard desks before committing.
Amazon price updated April 23, 2026 2:44 pm
Prices and availability are accurate as of the last update but subject to change. I may earn a commission at no extra cost to you.

Practical scenarios: how we position different setups

Single ultrawide: center at eye level, curve apex aligned with nose bridge, slight inward swivel so edges remain in peripheral view.
Dual landscape: main display straight ahead, secondary tilted in 20–30° for reference tasks; set heights so the primary dominates head position.
Triple curved stacks: middle at sightline, flanks canted to form a shallow arc; use staggered heights for document/read-reply workflows.

What we test for and the outcomes we care about

Reduced discomfort after long sessions (neck/upper back).
Fewer micro-adjustments during play — less fidgeting with screen position.
Cleaner desk footprint and unobstructed peripheral space for keyboards, mice, and stream decks.

These are the measurable and subjective signals we use when evaluating arms: small inputs that lead to big differences in focus, accuracy, and immersion.

2

Design and build: what to look for in materials, mechanism, and fit

We’ve moved past “does it hold a screen?” and into the details that separate a joyful monitor arm from an aggravating paperweight. In practical terms, that means judging mechanism, mount, load capacity, and rigidity — because small choices here change how the screen feels under your hand and how steady it stays while you play.

Mechanics: gas-spring vs spring-assisted vs friction

Gas-spring: one-handed, smooth, and repeatable. The piston stores tuned pressure so adjustments are effortless and stable across the arm’s range. That repeatability is why we recommend gas-spring designs (Ergotron LX, Fully Jarvis) for serious use.
Spring-assisted: cheaper springs with mechanical cams. Can work well initially but often need retensioning and can drift over time.
Friction joints: low cost and simple, but usually stiff and imprecise — fine for a second monitor or light-duty use, not for a primary display you adjust frequently.

Why it matters: smooth gas-spring travel reduces micro-adjustments mid-game and allows quick, consistent returns to preferred positions.

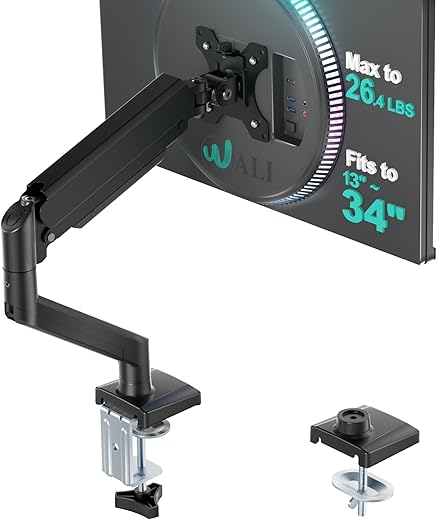
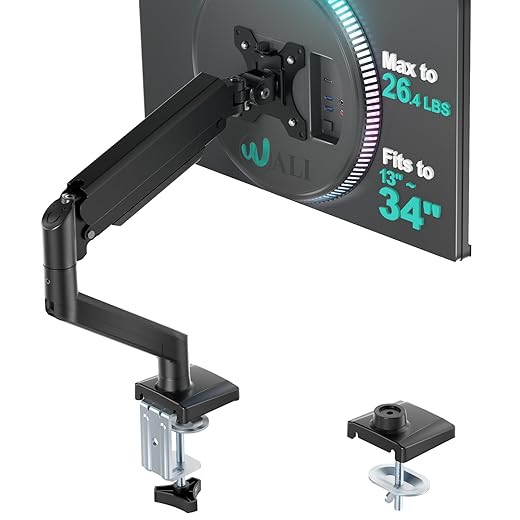
Mounting styles and practical trade-offs

Clamp: easiest to install, flexible across desk edges. Check clamp opening and desk thickness limits.
Grommet: cleaner and more rigid if your desk has a hole; great for thin desktops that can’t take a big clamp.
Wall: frees desk real estate and can be the most stable, but requires studs or good anchors and less flexibility.

Compatibility: VESA, weight, and shape

Check VESA (75×75 or 100×100) and confirm adapter availability for oddball mounts.
Always verify the arm’s weight rating — and add margin. For ultrawide or curved panels, assume a higher effective load because the screen’s center of mass sits further forward; we usually add 20–30% headroom.
Portrait orientation and deep-curved displays change torque; pick an arm rated for that torque, not just static weight.

Stability: what causes wobble

Arm length amplifies movement: longer reach = more torque and perceived wobble.
Preload/tension tuning matters — set it so the screen neither sags nor fights your touch.
Material stiffness and joint quality (aluminum or steel with precision bearings) reduce resonant wobble. In practice, a well-built aluminum arm will feel firmer than a cheap steel one with sloppy joints.

Finishes, cable management, and aesthetics

Built-in cable channels and tidy clamps make setups feel intentional.
Matte black often suits minimalist desks and hides smudges; brushed aluminum pairs nicely with premium monitors and lighter desks. Choose a finish that supports the visual coherence you want.

Next, we’ll apply these design choices to multi-monitor and streaming setups — how the right arm becomes the backbone of a broader gaming ecosystem.

3

Ecosystem integration: multi-monitor setups, streaming, and peripherals

When we widen our view beyond a single screen, the monitor arm stops being an accessory and starts acting like infrastructure. The payoff isn’t just a cleaner desk — it’s predictable, repeatable positioning that lets every other piece of gear do its job better.

Multi-monitor alignment and workspace choreography

Arms let us dial in height, pitch, and rotation so bezels meet exactly. That matters: a misaligned multi-monitor seam breaks immersion and makes quick eye-tracking tiring. In practice we use:

identical arms (two Ergotron LXs, or a twin mount like Ergotron HX for ultrawides) so movement feels synchronized;
portrait-mode-capable arms for a vertical 27″ or 24″ panel to host chat, browser tools, or Discord without losing horizontal real estate;
a short-reach arm on the keyboard side to clear a large mouse swath or place a controller pad.

Quick tip: level and measure once, then tighten clamps and document the height — you’ll thank us when swapping panels later.

Streaming and camera placement

For streamers, an arm is a reconfiguration tool. We can pop a webcam onto the monitor VESA bracket (Elgato Multi Mount or SmallRig adapters) and shift it independently of the monitor to avoid awkward sightlines or occluded overlays. That makes transitions between “game focus” and “chat focus” fast: move the camera, not the desk.

Microphones and capture devices also coexist better when planned:

pair a dedicated mic boom (RODE PSA1, Elgato Wave Arm) opposite the dominant arm to avoid collision;
mount USB hubs (Satechi clamp hubs or sticky-mount hubs) to the arm column to keep capture cards (Elgato 4K60) and dongles within reach but off the desk.

Standing desks and dynamic setups

Not all arms like constant height changes. Gas-spring models with long vertical travel (Ergotron HX, Fully Jarvis-compatible arms with tall risers) tolerate sit/stand adjustments; short-stroke arms can bind or need re-tensioning as the desk moves. We prioritize arms with generous vertical range and easy tension knobs if we frequently switch heights.

Practical interoperability checklist

Match arm capabilities to monitor sizes and portrait use.
Ensure accessory mounts or VESA adapters for webcams and hubs.
Plan mic and arm placement to avoid clashing arcs.
Choose arms with tall risers for standing desks.

The result: an arm that’s not just holding a screen, but orchestrating the whole desk. Next, we’ll weigh this ecosystem leverage against other popular upgrades so you can see the cost-benefit in plain numbers.

4

Why this beats some popular upgrades: a cost-benefit perspective

We often see folks chase the next big thing — a faster GPU, an ultrawide, a luxury chair, or a full suite of RGB — but when we map cost against day‑to‑day impact, a quality monitor arm routinely outperforms those headline upgrades for most people. Below we unpack that math and give practical rules of thumb for when an arm should be your next buy.

Dollars vs. daily impact

A decent monitor arm runs $50–$250 depending on gas-spring, range, and build. For that outlay you get immediate, constant returns: ergonomic neck/shoulder relief, exact sightlines, reclaimed desk surface, and faster reconfiguration for streaming or focused work. Contrast that with:

A midrange GPU (RTX 3060–4070 tier): $300–$800. Big gains in FPS, but none of those gains fix neck strain or a crooked panel that ruins long sessions.
A new panel (144Hz/ultrawide): $300–$1,200. Better immersion, but if the built‑in stand won’t center or rotate correctly, much of the benefit is squandered.
Premium chairs (Herman Miller Aeron, Embody): $400–$1,400. Excellent for posture, but after a strong midrange chair ($200–$500) returns diminish; the remaining marginal comfort is often smaller than fixing monitor height.
RGB rigs and lighting: $20–$200. Cosmetic and mood‑setting, with negligible ergonomic or workflow improvement.
Must-Have
HUANUO Single Arm Monitor Mount, Clamp/Grommet
Sturdy, easy-install ergonomic single-arm solution
We appreciate HUANUO’s single arm for one-handed height and tilt adjustments, automotive-grade components, and a 20,000-cycle durability claim that promises long-term stability for 13–32″ monitors. It installs in minutes via clamp or grommet and delivers reliable ergonomics that undercut premium competitors while keeping everyday desk life simple.
Amazon price updated April 23, 2026 2:44 pm
Prices and availability are accurate as of the last update but subject to change. I may earn a commission at no extra cost to you.

Real‑life scenarios where an arm wins

We upgraded a streamer’s GPU for higher bitrate output but left the screen tilted; viewers improved, but the streamer’s neck pain continued. An arm solved that in 30 minutes.
A friend bought a 34″ ultrawide and loved the picture — until the factory stand offset the center. A $120 dual‑pivot arm restored perfect sightlines without replacing the monitor.
For hybrid sit/stand desks, we’ve seen expensive chairs rub against standing‑desk instability; a tall‑travel gas arm delivers predictable alignment every time the desk height changes.

Diminishing returns and exceptions

After a performance threshold, more GPU power yields incremental frame‑rate gains; after a certain chair price, extra lumbar tuning may be subtle. By contrast, fixing ergonomics via a monitor arm gives daily, measurable wins. Exceptions: esports pros chasing every millisecond of input lag or color‑critical professionals may rightly prioritize top‑end GPUs, ultra‑high‑Hz panels, or hardware‑calibrated displays first.

Quick decision rules (how to choose now)

Prioritize an arm if you spend multiple hours per day at the desk, use multiple monitors, or have postural discomfort.
Match arm capacity to monitor weight and VESA size, and check compatibility with sit/stand motion.
If you’re debating between upgrades, pick the arm before cosmetic or incremental performance buys — you’ll notice the difference every session.
5

How to choose and install the right arm: checklist, common pitfalls, and setup tips

We’ll keep this practical — a tight buyer’s checklist, the mistakes we see again and again, and the setup tweaks that make an arm feel like it was made for your desk.

Quick buyer’s checklist

Confirm VESA pattern: most monitors use 75×75mm or 100×100mm.
Measure monitor weight and note the advertised weight limit of the arm (include stand, bezel, and any adapter).
Estimate center of gravity: for ultrawides and deep curved panels, measure distance from VESA holes to the screen’s midpoint — longer offsets need stronger arms.
Check desk thickness and edge style for clamp vs grommet mounting.
Plan cable routing: do you need internal channels or enough room for external ties?
Verify sit/stand compatibility: look for full vertical travel and stable tension across the desk’s height range.

Examples we use: Ergotron LX (reliable gas spring, wide range), Loctek D7 (good value for heavier panels), HUANUO Dual/Single arms (budget-friendly), North Bayou F80 (sturdy for large ultrawides).

Common pitfalls to avoid

Buying to size by inches, not weight — a 34″ ultrawide can outmass a 27″ panel.
Ignoring arm sag until small loosening becomes permanent; don’t “live” with drift.
Misplacing pivot when you want portrait rotation — VESA plate clearance matters.
Assuming clamps fit every edge trim — plastic rails, lip thickness, or angled edges can block proper clamping.

We once mounted a curved 34″ on a budget arm rated for 9kg and watched it slowly slide down over a week — a replacement arm with higher capacity solved it in 20 minutes.

Setup tips we actually use

Eye distance: sit back so the screen fills your natural field of vision; 20–30 inches is a good target for 27–34″ displays.
Height: top third of the screen at eye level; tilt slightly downward ~5–10° for reading comfort.
Tensioning: dial gas/coil tension so the monitor stays put even when we bump the desk; test with light taps and adjust incrementally.
Cable management: route cables through the arm’s channels, then secure with zip ties every 6–12 inches for a clean run.
Portrait mode: center the pivot over the vertical axis of the panel to avoid clipped rotation and rubbing.

Maintenance & quick checks

Retension joints after a month and then quarterly.
Replace worn grommet washers to restore clamping pressure.
Test for wobble under real typing and fast mouse swipes — resolve with tighter screws or a sturdier mount.

With the arm chosen and tuned, we’re ready to step back and look at what that change does for the whole setup.

A small change that improves everything

We close: a monitor arm is a low‑friction, high‑impact upgrade that improves ergonomics, sightlines, and the usefulness of your gear. For most of us it’s the fastest way to make gaming more comfortable and immersive. If your desk’s cramped, your neck hurts, or displays misalign, start here before chasing upgrades.

Chris is the founder and lead editor of OptionCutter LLC, where he oversees in-depth buying guides, product reviews, and comparison content designed to help readers make informed purchasing decisions. His editorial approach centers on structured research, real-world use cases, performance benchmarks, and transparent evaluation criteria rather than surface-level summaries. Through OptionCutter’s blog content, he focuses on breaking down complex product categories into clear recommendations, practical advice, and decision frameworks that prioritize accuracy, usability, and long-term value for shoppers.

Newest Posts