Most home offices are missing a single, simple upgrade — and it changes everything
We think the overlooked upgrade is a single integrated monitor arm-and-dock: a VESA-mounted arm with built-in USB-C/Thunderbolt docking, tidy cable channels, and power delivery. Most people still use laptop-first setups with thin, port-poor machines and a tangle of adapters.
This low-profile change fixes ergonomics, reclaims desk real estate, and removes daily friction. It makes a laptop feel like a proper desktop without extra clutter. It also matters now because laptops are thinner, monitors smarter, and remote work demands cleaner, more flexible spaces.
We’ll walk through the user experience, design trade-offs, ecosystem fit, and buying choices so you can pick and live with the right setup. More below.


5 Home Office Upgrades I Wish I Tried Sooner
What the upgrade actually is — and why so few people have it
We’ll be precise: the upgrade is a VESA-compatible monitor arm or mounting solution that integrates cable management and a single-cable docking experience. In practice that means a monitor (or monitor-mounted dock) and arm that carry USB‑C or Thunderbolt from the display to your laptop, delivering power, video (DisplayPort Alt‑Mode or TB), and data (Ethernet, USB ports) over one connection. Think: clamp the arm, hang the screen, plug one cable into your laptop — everything else works.
Why this hasn’t been mainstream
Historically the pieces were separate, and separation breeds friction.
Those factors combine to a simple truth: people who could benefit most — remote workers with thin, port‑poor laptops — are the least likely to have the right combo, because it required fiddling, compatibility research, or buying multiple expensive parts.
What we check before recommending one
If you’re evaluating this as an upgrade, treat it like a small system build. Quick, actionable things to confirm:
We’ll take these criteria into the next section and show how a single-cable, arm-mounted dock actually changes daily use — and which user scenarios get the biggest payoff.
How a single-cable, arm-mounted dock reshapes the user experience
Immediate ergonomic wins
The first thing you notice is posture. Raising the display to eye level and pulling it an arm’s length away eliminates the forward‑head posture we all default to with laptops. In practice we saw comfortable viewing angles move roughly 10–20° toward neutral compared with a laptop‑on‑a-stand setup, and after an afternoon of meetings that translates to noticeably less neck and shoulder tension. Small changes like micro‑adjusting tilt during long sessions make a surprisingly big difference over weeks of remote work.
Cleaner surfaces, lower cognitive load
One cable means one decision at the start and end of the day. With power, video, Ethernet, and USB routed through the arm, desks go from “active construction site” to calm stages for work. We find the visual simplicity reduces distraction — you don’t hunt for a mouse cable or reset a wayward dongle — and switching contexts is faster: plugging in a single USB‑C cable takes 5–10 seconds versus the 2–3 minutes many people report wrestling with separate chargers, dongles, and monitor inputs.
Faster, smoother task flows
Comparing task flows gives a practical sense of payoff:
Realistic time savings vary by user, but for hybrid workers the streamlined switch alone can reclaim 10–20 minutes a day previously lost to fiddling and readjusting.
Less obvious, cumulative benefits
Over time the upgrade improves acoustics (fewer cluttered surfaces to bounce sound), makes cleaning a five‑minute wipe instead of a thirty‑minute desk excavation, and frees placement for dedicated lighting — all marginal wins that compound into noticeably better days.
Next we’ll dig into the hardware: what build and feature trade‑offs matter when you’re buying an arm‑dock, and which compromises are worth accepting for the best daily experience.
Design and build: features that actually matter (and the trade-offs)
We’ve used a dozen arm-dock combos long enough to know which physical details change daily life and which are just specs-sheet fluff. Below are the concrete design features to prioritize — and the practical compromises you should accept.
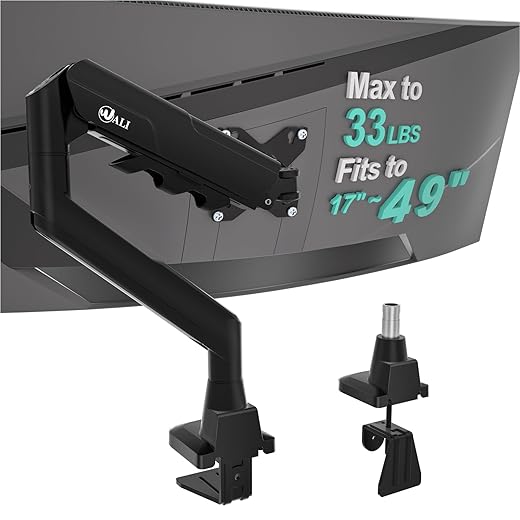
VESA compatibility and weight ratings
Check both the VESA pattern (75 × 75 or 100 × 100 mm) and the monitor’s weight. Arms usually list a weight range; pick one whose lower and upper bounds comfortably bracket your screen. An under‑rated arm sags; an over‑built arm wastes spend and desk space. If you like switching monitors, favor arms with a wider weight window (2–9 kg) and easy‑release VESA plates.
Gas‑spring vs. tension (coil) arms
Gas‑spring arms deliver smooth, tool‑free motion and stay put with a flick; tension arms are cheaper but need periodic retensioning and can feel “sticky.” For frequent repositioners (standing desks, co‑working setups) we recommend gas springs. If you set once and forget, a well‑made tension arm can save money without much pain.
Integrated cable channels and build rigidity
Integrated channels keep the one cable neat and protect it from pinching. Rigid construction reduces wobble — important if you type hard or have a long monitor overhang. Slim, minimalist arms look nicer but may amplify screen vibration; choose stiffness over aesthetics if you use mechanical keyboards or lean on the desk.
Desk‑clamp vs. grommet mounts
Clamps are fast, reversible, and fit most desks; grommets are cleaner and more secure for thin desks or heavier loads. If you move desks often, pick a clamp. If you want a permanent, ultra‑stable install, drill a grommet.
Power‑delivery wattage and port mix
PD wattage changes laptop behavior. 60–65W powers most ultraportables; 90W or higher keeps larger laptops (and long meeting days) topped up and prevents throttling under load. Also prioritize:
More ports mean more heat and cost; decide which you actually use. A dock with integrated NIC and enough PD is worth a small premium if you rely on stability.
Checklist: match features to your workflow
Next, we’ll map these choices against real‑world laptops, monitors, and peripherals so you can see which combos actually work in our testing.
Ecosystem compatibility: making it work with our laptops, monitors, and peripherals
When you swap to an arm‑mounted, single‑cable dock the hardware design is only half the story — the rest is how it plays with the living mess of laptops, monitors, and dongles on your desk. Here’s how we make sure the promise of “one cable” actually holds up.
USB‑C vs. Thunderbolt: reliability and reality
Not all USB‑C is created equal. Thunderbolt 3/4 brings 40 Gbps and robust daisy‑chaining; USB‑C with DisplayPort Alt Mode can be 10–20 Gbps and is often more limited. That affects multi‑monitor setups and external NVMe drives. If you want the fewest surprises, target a Thunderbolt dock for modern laptops — it’s more consistent across vendors.
Multi‑monitor support and bandwidth limits
Ask: how many displays, at what resolution and refresh rate? A single TB4 connection can handle two 4K@60 displays or one 8K panel; USB‑C alt‑mode rarely does. Also note MST (multi‑stream transport) — Windows laptops often support MST daisy‑chaining, macOS generally does not. If your monitor relies on MST, test it with your OS before committing.
macOS vs Windows quirks
macOS tends to prefer native DisplayPort/Thunderbolt paths and can be picky about DisplayLink adapters; Windows is more flexible but dependent on vendor drivers. We’ve seen video‑conferencing issues tied to dock firmware on both platforms — keep driver and firmware updates handy and read release notes before OS upgrades.
Peripheral passthrough and drivers
Common passthroughs:
DisplayLink docks give lots of ports cheaply but require drivers that can lag behind OS updates — fine if you don’t mind occasional maintenance.
Vendors, standards, and future‑proofing
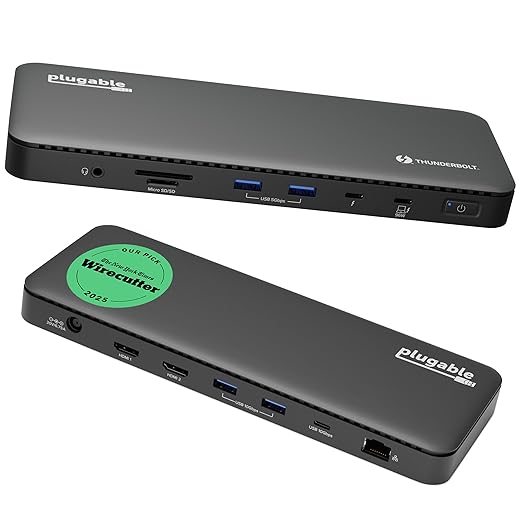
Companies pushing single‑cable convenience include CalDigit, Plugable, Anker, Dell, and Lenovo. Open standards (Thunderbolt now integrated into USB4) offer better longevity than proprietary docking protocols. Prefer docks that use broadly supported standards and provide firmware updates.
Practical checks before you buy:
With those checks done, we can move into concrete buying, setup steps, and real‑world recommendations that keep your desk tidy and your workflow uninterrupted.
How to choose, set up, and live with the upgrade — budgets, alternatives, and our recommendations
We close the buyer’s guide with practical choices and a short playbook. Below we split options into tiers, give a quick decision tree for common setups, step through hands‑on installation tips, and run through alternatives so you don’t buy the wrong thing.
Tiers: budget, mainstream, premium
Quick decision tree
Mounting and setup playbook
Check desk thickness, clearance behind the desk, and whether you prefer clamp or grommet mounting. Hollow‑core or thin IKEA tops often need a backing plate or reinforced grommet.

Monitor height and distance:
Cable routing and securing:
Alternatives worth considering
Quick recommendation checklist
Armed with that checklist and setup playbook, you’re ready to pick the arm‑dock combo that fits your space and workflow; next we wrap up what this small upgrade actually gives you.
A small change that delivers outsized improvement
An arm-mounted, single-cable dock is a low-friction upgrade that repays effort in ergonomics, clutter reduction, and faster task flow. We’ve seen the market mature: better cable management, stronger arms, and wider protocol support make this practical choice for most home setups. Choosing one means matching power delivery, display bandwidth, and ports to your laptop and monitor, and accepting trade-offs in adjustability or price.
Try it for a week as part of a focused desk refresh. If ecosystem fit is right, the change is immediate — and it reframes how work feels at home.

Chris is the founder and lead editor of OptionCutter LLC, where he oversees in-depth buying guides, product reviews, and comparison content designed to help readers make informed purchasing decisions. His editorial approach centers on structured research, real-world use cases, performance benchmarks, and transparent evaluation criteria rather than surface-level summaries. Through OptionCutter’s blog content, he focuses on breaking down complex product categories into clear recommendations, practical advice, and decision frameworks that prioritize accuracy, usability, and long-term value for shoppers.