
Why small changes often matter more than big purchases
We believe you don’t need a six-figure setup to make movies, games, and shows feel noticeably better. Instead of chasing flagship TVs or new receivers, focused, low-cost upgrades—better soundbars and compact speaker kits, a faster streaming stick, picture calibration and bias lighting, simple room treatments, smarter remotes and automation, and comfort and lighting tweaks—deliver the biggest practical gains. These are the sections we’ll unpack.
By budget-friendly we mean affordable, high-impact choices that fit existing gear and lifestyles. We judged cost-effectiveness by user-experience impact, design and fit, and ecosystem compatibility. Our aim: practical, modern advice that shows not just what improves a room, but why it matters now in today’s crowded market.


Smart Budget Home Theater Hacks for Easy Upgrades
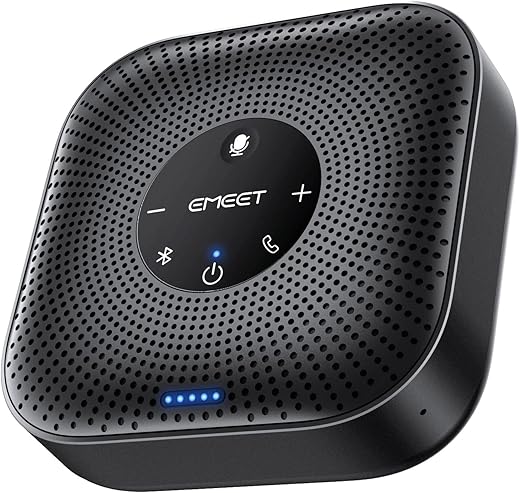
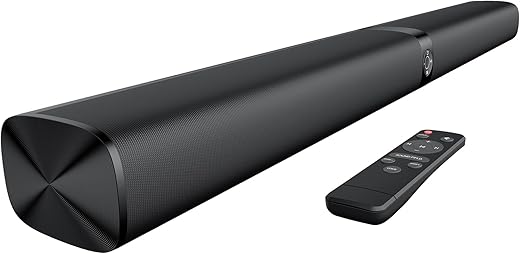
Start with sound: budget soundbars and compact speaker kits that actually improve clarity
Why audio delivers the biggest perceptible upgrade
We found that swapping a TV’s tinny onboard speakers is the single fastest way to make everything sound better—clearer dialogue, real bass impact, and a sense of space you actually notice during movies and games. We’ve sat in living rooms where a modest soundbar made subtitles obsolete and late-night action scenes suddenly intelligible. That’s because humans perceive changes in sound quality more directly than small improvements in screen specs.
Form factors: low-profile soundbars vs. powered speakers + sub
Choose based on layout and priorities.
Connectivity and ecosystem trade-offs
Match inputs to your devices:
If you want voice control integration, pick a model that advertises Alexa/Google support or pairs cleanly with a smart speaker.
Setup and placement tips that matter
Small choices here (placement, input selection) often outweigh marginally better hardware—so test configurations before spending up the chain.
Upgrade your source: why a better streaming stick or media player changes everything
Why swap the streamer?
We’ve seen more “wow” moments come from swapping a creaky built‑in Smart TV platform for a modern dongle than from tweaking color settings for hours. Newer streamers are snappier, handle HDR tone mapping more intelligently, and decode newer codecs that keep 4K titles looking right. In practice that means less stuttering in menus, faster app launches, and movies that actually show the right highlights instead of a crushed or washed‑out image.
What matters in a streamer
Look for features that produce perceptible differences, not specs on paper.
Practical integration tips
A small streamer can be the most cost‑efficient upgrade in a home theater — it simplifies control, improves compatibility, and often fixes the snappiness and quality problems we all notice first.
Picture without a new TV: calibration, bias lighting, and simple tweaks that improve image quality
Calibrate the easy way
We don’t mean buying a spectrometer. Start with the TV’s built‑in tools and a few free test clips. Switch to “Movie,” “Filmmaker,” or “Cinema” mode—those modes usually lock out over‑sharpness and exaggerated color. Play a known reference clip (Spears & Munsil or 4K HDR test videos on YouTube) and tweak Brightness (black level) and Contrast (peak white) until details in shadows and highlights are visible. Small moves here make faces look natural and restore shadow detail that TVs often crush.
Kill the bad processing
Many TVs over‑process to make footage “pop.” Turn off noise reduction, motion smoothing (soap opera effect), and excessive sharpening. These features can soften detail or introduce artifacts, especially in films. Enable Game Mode when you need low latency—our tests consistently show it reduces input lag and usually turns off extra processing automatically.
HDMI, HDR, and when cables matter
Set your HDMI input to “Enhanced” or “HDMI 2.0/2.1” mode so the TV accepts full color depth and HDR metadata. Make sure your streamer or console outputs the correct HDR format—HDR10, Dolby Vision, or HLG—matching what your TV supports.
Bias lighting and eye comfort
Adding a neutral white bias light behind the TV improves perceived contrast and reduces eye strain in dark rooms. We prefer a 6,500K neutral option that doesn’t tint the picture; RGB strips are fun but stick to a neutral white for accuracy.
These picture fixes are small, fast, and reversible—and they pair nicely with room treatments that address reflections and sound, which we’ll tackle next.
Treat the room for better sound: affordable acoustic fixes that reduce echo and muddy bass
We often forget that the room is the loudspeaker’s partner. Reflections and standing waves smear dialogue, wash out punch, and make bass boomy — problems a bigger amp or flashier speakers can’t fix. The good news: strategic, inexpensive treatments usually deliver more audible improvement than spending the same money on hardware upgrades.
Quick, reversible fixes that actually work
Start with easy, immediate moves we can do in an afternoon:

First reflection points and cheap absorption
Use the mirror trick: have someone slide a mirror along the side walls while you sit in the sweet spot — where you see the speaker in the mirror is a first reflection point. Mount panels there and on the ceiling above the listening position. Affordable foam or fabric‑wrapped panels tame clarity-robbing reflections without looking like a studio.
DIY bass traps and targeted low‑end control
Low frequencies live in corners. We’ve built corner traps from Owens Corning 703 or Rockwool wrapped in breathable fabric and stuffed into triangular frames — 4–6 inches thick is a good start. If DIY isn’t your thing, look for budget corner traps or stackable foam bass traps; they don’t need to be pretty to be effective.
Placement tweaks that matter
Small speaker moves often outperform fancy electronics. Rules of thumb:
Aesthetic, renter, and buy-vs‑DIY tradeoffs
For renters, use Command hooks, freestanding panels, or thick drapes. If you care about design, pair fabric panels with frames or use bookshelves as intentional diffusers. DIY is budget‑friendly and customizable; buy commercial panels when you value consistent performance and finish.
These room changes integrate cleanly with whatever speakers or AVR you already own — and they set us up to make control and automation feel truly seamless next.
Make control feel effortless: remotes, automation, and voice integration on a budget
We treat convenience as a core part of the home‑theater experience. A messy tangle of remotes and half‑baked apps kills immersion. Below we break down practical, affordable routes to make disparate gear behave like a single system.
Remote types — reliability, learning, and integration
We split options into three practical buckets:
In practice, we prefer a hybrid: a local IR remote for core playback and a cloud‑enabled hub for scenes and voice.
Cheap automation that feels premium
You don’t need a $1,000 remote to get one‑button magic. Use HDMI‑CEC to let a single power press wake the TV and downstream devices; tie a cheap smart plug or IR hub to trigger lighting scenes when the display powers on. If you already have smart bulbs, we recommend centralizing them behind a bridge for reliable local scenes.

Ecosystem strategy and concrete examples
Locking into one assistant (Alexa, Google, Siri/HomeKit) simplifies routines and reduces friction — but it can lock you out of platform‑specific perks. Our approach: pick one assistant as primary, keep a secondary for niche devices, and use local automations (bridges, CEC, smart plugs) to avoid vendor outages.
Practical automations we use:
Next, we’ll move from control to comfort — seating, blackout, and lighting choices that finish the experience.
Comfort and lighting: how seating, blackout options, and smart lights finish the experience
We treat ergonomics and atmosphere as the last and often decisive layer. You can have reference-grade audio and a calibrated image, but if your back hurts after 20 minutes or glare washes out contrast, you won’t use the room the way you intended. Here’s how we prioritize low-cost changes that actually change behavior.
Seating: small buys, big comfort gains
We focus on posture and support before replacements. Add a firm lumbar cushion (memory‑foam or wedge style) and a thin seat topper to reduce pressure points. For small rooms, modular lounge chairs (IKEA POÄNG or similar compact recliners) offer good back angle and a smaller footprint than home‑theater rows. If you want motorized comfort without the price, consider a recliner topper or a budget electric recliner.
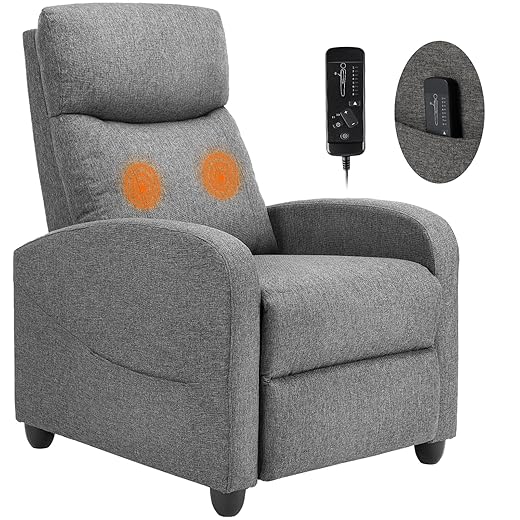
Quick tips:
Blackout: keep contrast consistent
Blackout curtains are the easiest ROI: thick, tightly woven panels or a blackout liner stops most daytime glare. For a tighter seal, add blackout roller shades (IKEA Fyrtur or budget alternatives) or adhesive blackout film for small windows. Even thin light leaks around edges kill perceived contrast; use overlap and a valance where possible.
Lighting: bias, scene, and color temperature
Bias lighting behind the screen raises perceived black level and reduces eye strain. Use neutral bias (~5000–6500K/D65) for accurate contrast; keep room ambient lights warmer (2700–3000K) for comfort. Affordable options: Philips Hue for robust scenes, Sengled or Govee strips for cheaper local control. Tie bias and room lights into your “Watch” scene so they dim or switch color temperature automatically.
These last layers are as much about habit as hardware — make them easy to use, and we’ll actually sit down and enjoy what we’ve built. Next, we’ll wrap up why small investments yield big returns.
Small investments, big returns
We’ve shown targeted, affordable upgrades—soundbars or compact speakers, a better streaming stick, picture calibration and bias lighting, acoustic panels, and automation—fix the UX problems TVs don’t: clarity, latency, and system friction. Today’s market rewards devices with design and ecosystem compatibility because those small buys compound into lasting value.
To decide, diagnose your biggest annoyance, pick the lowest‑friction fix that solves it, and favor components that play well together. Want simplicity? Stick to one ecosystem. Want audiophile sound? Prioritize speakers and room treatment. Want automation? Add a hub and routines. Focused changes recreate a full overhaul’s joy.

Chris is the founder and lead editor of OptionCutter LLC, where he oversees in-depth buying guides, product reviews, and comparison content designed to help readers make informed purchasing decisions. His editorial approach centers on structured research, real-world use cases, performance benchmarks, and transparent evaluation criteria rather than surface-level summaries. Through OptionCutter’s blog content, he focuses on breaking down complex product categories into clear recommendations, practical advice, and decision frameworks that prioritize accuracy, usability, and long-term value for shoppers.